
A Zelda Game Maker, with advance scripting capabilities.
Legend of OZ is inactive, if you are looking for a Game Creation Tool then have a look at
Mokoi Gaming. Otherwise
Legend of OZ, which Legend of OZ is a updated
Fork of, is still available.
Before you get started
Open your Quest Designer and click on Create a new Quest. Next choose a name for your quest. Lets call it NewGame and then click OK. Now you should see a screen with lots of boxes. In each of the boxes there should be two numbers and a comma between them. Exactly like this:
| 0,0 | 1,0 | 2,0 | 3,0 |
| 0,1 | 1,1 | 2,1 | 3,1 |
| 0,2 | 1,2 | 2,2 | 3,2 |
| 0,3 | 1,3 | 2,3 | 3,3 |
Left click on a screen. Then a small box should come up on the screen
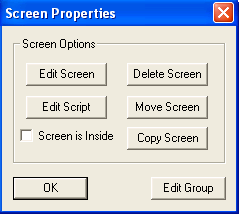
- Edit Screen
- Edits the screen
- Edit Script
- Edits the script for the screen
- Delete Screen
- Deletes the picture for the screen
- Move Screen
- Moves the screen to another location, you choose the location
- Copy Screen
- Copies the screen and put the copy in another screen, you choose the location
- Screen is Inside
- This will prevent the screen from getting dark when it becomes night.
- Edit Group
- Takes you to another menu box once you create a screen
Once you create a screen you'll be able to see this box by either clicking on Edit Group or right clicking a box but I'll talk about this later.
Getting Started
Left click on the screen 0,0 and click edit screen. You should now see a screen that looks something like this:
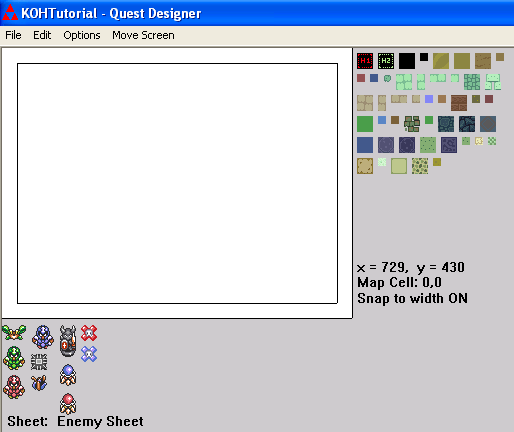
- Fill tile
- A picture that can be spread out across the screen, like a pattern.
- Sprite
- A picture that you place on the screen one piece at a time.
- Entity
- These are used for libs or for telling a sprite what to do.
- Cell/ Map Cell
- 1 screen, 1 box. There are 255 by 255 map cells.
On the right side of your screen you will see fill tiles. Use your Page Up and Page Down keys to scroll the fills up/down. On the bottom of your screen are the sprites/ entities. Use the arrow keys to see more sprites/ entities. Right near the fill tiles you'll see:
x = y = - This is the x and y coordinate of the entire Cells
Map Cell: 0,0 - It says 0,0 because that is the screen you clicked on
Snap to Width - this will either be On or Off and is used to make sprites easier aligned.
Lets get started with the picture, shall we? Now in screen 0,0 we'll be making the inside of a house. Push the up or down key until you see this picture at the bottom of your screen

Use your left or right key to see more of the Inside House sprites. Place the mouse cursor on the top left sprite and left click on it. Move it to the white box/screen and left click the mouse. If the picture is cut off then you placed it outside of the box. To undo a sprite push the T on your keyboard. You can also left click on a sprite and then push the Del key to remove it. This can be useful if you want to just remove some sprites
instead of erasing most of your screen. Push it even if you didn't make a mistake!
Place the same sprite or a different sprite on the screen and press the right mouse button. Now you'll be able to pick a different sprite if you want to. Lets clear the screen! You can either clear your screen by holding or pressing the T for so long or you can click on edit and click on clear screen. Make sure you click yes!
Next lets work on a fill tiles. The fill tiles are on the right side of your screen. Place your cursor on this fill  and left click the fill. Place your cursor on the screen and hold down the right mouse button and drag across the screen. To get rid of a fill press the F on your keyboard. Now try your best to create this picture:
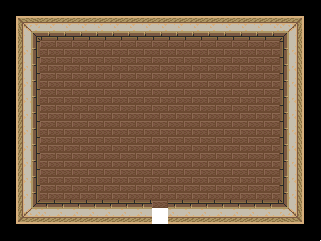
The picture is not done yet but it will be easier to create exactly. Now create the rest of the picture
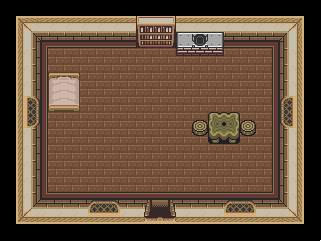
Now left click on the door. You should now see the information for the door. It should look exactly like this.

If the screen coordinates do not match up that means your door is not aligned right. Let's save our screen! Place your cursor on file then click Save screen. Now click Back to Map layout. If it says Save the current screen? then click yes. It will only say this if you never saved the screen!
You should now be back to the screen with the cells. We need to put our screen in a group. Place your cursor on the top left of the screen 0,0. Hold down the right mouse button and drag. Make sure the blue borderline only covers the screen 0,0. Make sure you don't place the cursor too much top left, if you do you won't see a blue borderline. If you messed up with the borderline you can left click on the screen, then click on Edit Group, and last click Delete Group. I don't recommend doing it that way, instead right click the group and click Delete Group.
Before we test our quest lets save it awhile. At this point you only saved the screen and not the entire quest. Go to file, then click on save. To test our quest go to file, Test Quest in Open Zelda. Now there might be some reasons why your quest didn't load.
1. First make sure you downloaded Open Zelda.
2. Since this is your first time testing your quest it don't know where your Open Zelda is at.(only if you did not use OZ installer!)
To find your Open Zelda Go to File, Configure quest Designer, Find Open Zelda.exe. Now look for your Open zelda.exe program, click on the Open Zelda.exe file. Your Open Zelda file will have a gold triforce next to it. The quest is boring at this point so lets add more screens!
Screen Making
If you skipped all the way down to here and you don't know anything about making any kind of screen click
here
Lets make some more screens but before we do left click on the screen 0,0 and click
on the screen inside box. This will prevent it from getting dark in this screen.
Now left click on screen
3,3 and click edit screen. Let's create an outside area with a few houses. Press the up or down arrow key until you see General Outside Tiles.

Follow the steps for this screen and try the best you can.

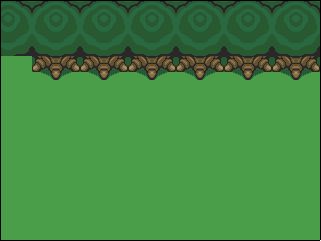

Some things you need to know. When overlapping trees you need to go from the top to the bottom. Otherwise it will end up looking wrong. Also if you find it's too difficult to overlap you may use 
but it won't look as nice.
Add some flowers, grass, or an enemy if you like to but don't add too much because we'll be adding to this picture. Save the screen and then click on move screen and click Right.
You should now see a blank screen. You should also see the screen 3,3 you created on your left side. This makes it easier to piece together. Now create this picture the best you can.
Screen 4,3
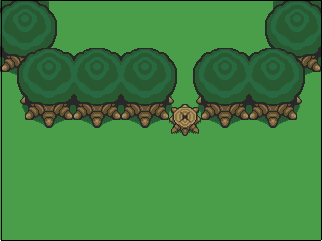
Ok, now move the screen down one. Now where going to create a house. First press the up and down keys until you see:

Try to follow the two steps for creating a wooden house.
Screen 4,4
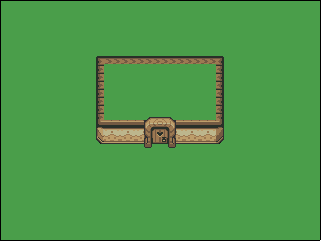
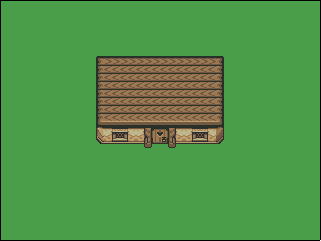
Note: Do not place the door and then a wall on top otherwise it will be override with the wall's mask.
The screen coordinates for the door are
x = 144, y = 120 for anyone that wants it to be just like my wooden house. Don't worry about the wall being on top of the door because when you test your quest it will fix itself. Save the screen and Go back to map Layout. You should now have a picture in screen 0,0 3,3 4,3 and 4,4. Now I'll make one more house. Now click on screen
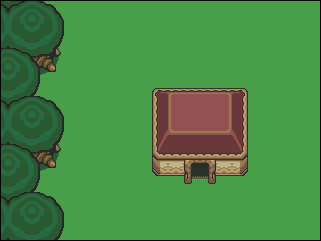
3,4 and we'll make another house. Try to make this screen in one step:
 Screen Coordinates
 These are the coordinates for a screen. A screen is 320 by 240 pixels.
World Coordinates: These are the coordinates for the entire map for your
quest. World coordinates are 81,920 by 61,440. That should be plenty of space to work with for any big quest.
The screen coordinates for this door is: 184,152. Remember those are the x and y screen coordinates and not the world coordinates. To create the center of the roof use the red fill. Save the screen and go back to map layout. Now create the screens 5,3 and 5,4 from this picture.
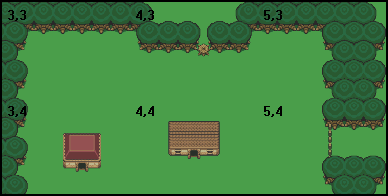
In screen 5,4 you see some brown objects. Those brown objects
is a south facing fence.

Make sure you place the last fence piece under the tree otherwise the player could squeeze through easily.
In screen 3,5 4,5 and 5,5 were going to use some rock sprites. First create this picture.
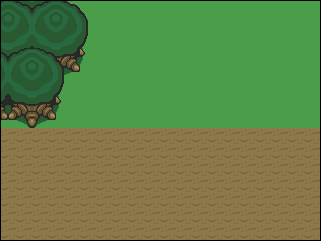
Scroll down or up until you see Rock Sprite Sheet. Try to create the rest of the screen in two steps:
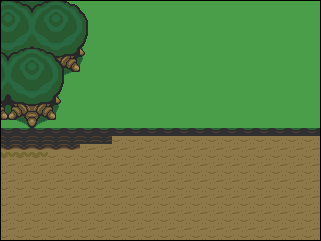

Lets speed up the screen making and finish the last two screens in a few steps.
Screen 4,5


Screen 5,5
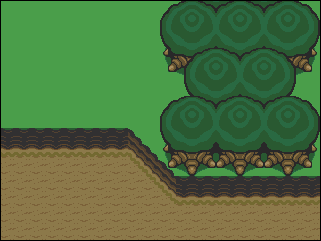
In screen 4,5 hopefully you figured out how to use these rock sprites with no problem. In screen 5,5 you will need to do some slight overlapping to get it to fit perfectly together. Now if your having some problems here is a pic of what it should look like before you overlap.

Now drag the blue borderline from screen 3,3 to 6,6 and will look like this:
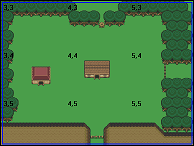
Before we test our quest again let's make the player start at a different position. Go to Options and click on Quest Properties. You should now see a new
box! Change the x to
1460 and change the y to
900 and click OK.
If you click on screen 4,3 and move your mouse around until your x= 1460 and your y= 900 and that is where the player will start at. One last thing we should do before testing our quest. Right click anywhere inside the screens 3,3 to 5,5 and click on the arrow and choose
lightw.it. This will add music to our quest. Go ahead now and test your quest!
Note: If an attention box and says not all your screens is in a group then
you forgot to put a blue box around screens 3,3 to 6,6!
First, left click on a screen that you made and click edit script. In every screen or group that you make it will automatically show you this script.
//#include <entity>
//#include <entity>

main()
{
}
Let's brake this script down a bit, piece by piece.
// - This is for making comments in your scripting. This mean you can
write anything you want after it. The typing will show a green color but will
only for one line.
/* - This is for making comments for multiple lines.
*/ - This is what you use to end the multiple line comments.
All these methods can also be used to ignore a script line and can be handy for finding errors without erasing everything.
Example1:
//#include <entity>
//#include <general>

main()
{ //This will show up in green and not effect
  //the script.
}
Example2:
/* #include <entity>
#include <general>

main()

{ This will show up in green and not effect
  the script.
}
Do you get how these comments work? If not I'll still be useing them in the
next few scripts.
{ - Begins the part of the script.
} - Ends that part of the script.
#include <entity> / #include <entity> - If you use any command that is from the .inc file you'll need this line.
Just go to your compiler\INCLUDE directory and check inside for the list of the commands.
Ok now lets start scripting! Click on screen 0,0 and edit the screen. Click on the door and name it door1 Now go to edit and click edit script. You can edit the script from the screen that you are in! Use this script.
#include <entity>
#include <general>

main()
{ // Begins the main script
	if ( FirstRun() )
	{// Begins the First Run
		SetString("door1", 0, "door1a");
	}// Ends the First Run
}// Ends the main script
if - if this happens do something.
else if - if the first something does not run then run the do this.
else - if none of the lines run then this line will run.
FirstRun - Do something every time you enter the screen or group. This
will be used a lot.
Save it but don't save as. Also remember to save the screen otherwise the name
you just added for the door will go away.
Now go to screen 3,4 and name the door
door1a and use this script for the screen
#include <entity>

#include <general>

main()

{

	if(FirstRun())

	{

	 SetString("door1a", 0, "door1");//Do you see how the doors names are reversed in this script?

	  }

}


Now go ahead and test your quest! You should be able to travel in and out the house. Also it should play the same music inside your house even though you never set any music for the inside of your house. SetString can be used for other stuff besides doors. It can be used for setting messages for signs. Place a sign in screen 3,3. Name it sign1 and use this script for your screen.

#include <entity>

#include <general>

main()

{

if(FirstRun())

{

 SetString("sign1", 0, "So how do you like this tutorial so far?");

}

}

Save it and test it out. To read a sign just collide with it, face north, and
 press the Q Key.

Time Scripting
You can change the day, hour, or minutes to whatever you want. You can also change how fast time goes. This can be useful if you don't like the default speed for OZ. All you need is SetHourCount(#); Place a number instead of # and use the numbers 0-23. If you use any other number you will get some weird effects and sometimes it will get pitch black. Use 22 and place it within first run. Don't delete your old script just add it in the First Run.

Here is the Answer for how it should look. Test it out and when you walk into screen 3,3 it should get dark!

Let's use else and if in our scripting. Try this script in the same screen and replace the old script.

#include <entity>

#include <general>

main()

{

if(FirstRun())

{

SetHourCount(22);

}// Ended the first Run

if(GetHourCount()== 22)// This is part of the main script

{

SetString("sign1", 0, "The time is 10 o'clock at night");

}

else

{

SetString("sign1", 0, "So how do you like this tutorial so far?");

}

}

Note: The equal sign will look a little bit different in the script.

Test it out and read the sign and it should say that its 10 o'clock. Then wait about thirty seconds and it will say our other message.

Now to show you all the main symbols for scripting.

&& - and

|| - or, this is located below the backspace key

== - equal, How to use it: if(something == 0)

= - equal, How to use it: something = true;

<= - equal or less than

>= - equal or greater than

< - less than

> - greater than

!= - does not equal

! - not, how to use it:!isopen, !isActive

Try a couple of these symbols in the script instead of using ==.

In the script we just made you can only use the following symbols:

==

<=

>=

>

<

!=

Change the script back to just the sign and nothing else. If for some reason your confused just copy and paste answer1 script.
Put an old man in screen 4,4 x = 1358 y = 1012 and name the npc
npc1. Lets also make a path like this:
 To
To make a npc talk you need to use SetString. I want you to make the script for this screen. Just a basic script and try to figure out where this line would go:
SetString("npc1", 0, "Hello there young fellow.");
answer2
To make a npc talk and you can give answers will need a different script. Change your script to:
#include <entity>
#include <general>
main()
{
if(FirstRun())
{
MessageMap("npc1", 0, "Hello there young fellow. How are you today? ` |I'm fine |Not so good |Terrible `|Shutup old man", true, 1, 2,2,3);
MessageMap("npc1", 1,"Glad to hear that your doing fine.",false,1);
MessageMap("npc1", 2,"That's a shame!",false,2);
MessageMap("npc1", 3,"Don't tell me to shutup and don't call me an old man. Now, I'm going to ask you again.",true,0);
}
}
Test your quest first and then I'll explain how MessageMap's work. Now
MessageMap's are mainly used for npc's even though it has other possibilities.
MessageMap(ident[], index, Message[], gotoNext, ...);
The ident[] is where you place the name of the npc. In this script it was
npc1. Index is for keeping it organized. Make sure you don't repeat index numbers otherwise you'll have some overriding scripts.
The Message[] can be any type of message you like or how long you like. Your only allowed up to 640 characters by default but that should be plenty.
gotoNext is if you want another message to popup or not.
... this is where you place numbers for what index the message should go to after your done reading. If you have no choices for answers then you only need one number. If you have a few answers then you can choose different indexes for different answers.
Let's try another message map script differently this time. Try this script:
#include <entity>
#include <general>
main()
{
if(FirstRun())
{
MessageMap("npc1", 0, "What a nice day out!", false, 1);
MessageMap("npc1", 1, "I'm getting tired so don't bother me anymore", false, 2);
MessageMap("npc1", 2, "Get lost! I told you I'm tired.",false, 3);
MessageMap("npc1", 3, "Why must you keep bothering me? `|It's fun! |Ok, I'm done bothering you.",true,4,5);
MessageMap("npc1", 4, "Hey I'm no longer tired.", false,0);
MessageMap("npc1", 5, "Thank-you",true,4);
}
}
Test it out and talk to the old man until you see Hey I'm no longer tired.
` - means go to a new line, its located above the tab key.
Now if you look at the this script I used false for the index 0 - 4. When it's set to false that means you have to keep talking to him to get the next
message. Now for index 5 it was set to true so basically it made you read the next message.
Making a npc walk and talk
First get rid of the script in screen 4,4 and change it to this:
//#include <entity>
//#include <general>
main()
{
}
If you don't atleast have:
main()
{
}
Then your going to get scripting errors. I just have the entity and general
lines to make it look nicer. Instead of making it a screen script I'm going to
make it a
group script instead.
Right click anywhere whithin the screens 3,3 - 5,5 and click
Edit Group's Script.
The group is any screen inside the blue box. Now use this script:
#include <entity>
#include <general>
main()
{
if(FirstRun())
{
CallFunction("npc1", false, "WalkTo", "nnn", 1344, 1116, 0);
}
}
When you test it out the npc will walk south to the coordinates 1344, 1116 and then will stop. Lets make the npc walk some more. To make the npc walk again you need to get rid of the FirstRun because it's not needed this time. Here now use this script.
#include <entity>
#include <general>
main()
{// We don't need a FirstRun all the time
CallFunction("npc1", false, "WalkTo", "nnn", 1344, 1132, 0);
CallFunction("npc1", false, "Wait", "nn",2000, 1);
CallFunction("npc1", false, "WalkTo", "nnn", 1522, 1132, 2);
CallFunction("npc1", false, "Wait", "nn",1000, 3);
CallFunction("npc1", false, "SetHeadDirection","nn",north, 4);
CallFunction("npc1", false, "Wait", "nn",1000, 5);
CallFunction("npc1", false, "SetBodyDirection","nn",north, 6);
CallFunction("npc1", false, "Wait", "nn",500, 7);
CallFunction("npc1", false, "WalkTo", "nnn", 1522, 990, 8);
CallFunction("npc1", false, "Say", "sn", "I'm just walking in a circle!", 9);
CallFunction("npc1", false, "WalkTo", "nnn", 1344, 990, 10);
CallFunction("npc1", false, "SetInstruction", "nn", 0, 11);
}
When you test it out he'll walk to 1344,1132. Then he'll wait for two sec. Next he'll walk to 1522,1132. After that he'll turn his head north and soon turn his body north. When he walks to 1522,990 he will say I'm just walking in
a circle. He'll keep walking around and around.
Let me explain some of the script and then I want you to make one on your own.
n - This stands for number.
s - This stands for string.
Example:
"n",0);
"nn",0,0);
"sn","What ever",0);
"ss","what ever","Whatever");
Get it?
true - This should be only set to true if its using a lib script but
with npc walking it will never be set as true. If you do then it will not work.
false - This is what you should always set to for npc walking.
CallFuction - This is used for running public scripts. You can create
your own but I'll teach you later.
WalkTo - makes an npc walk.
- makes the npc wait, 1000 = 1sec
Say - makes the npc say a message.
SetBodyDirection - Turns the body of the npc for the direction you set.
You can choose north, south, east, west but make the npc wait a bit or it will
not look right.
SetHeadDirection - Turns the head of the npc for the direction you set.
SetInstruction - Set the instruction to whatever you want. This can be
used to make it repeat all the steps over again.
Example:
CallFunction("npc1", false, "SetInstruction", "nn", 0, 11);
Tells the npc to go back to instruction 0.
CallFunction("npc1", false, "SetInstruction", "nn", 5, 11);
Tells the npc to go back to instruction 5.
Also notice how the numbers go in order. I'll teach you more npc CallFuctions but first I want you to make a script.
I want you to have the npc walk to 1344, 1132. Then I want the npc to wait one sec. Next I want the npc to walk to 1344, 990. Now I want the npc to walk to 1522, 990. Then make the npc say "I'm a Wacko!". Next I want to have the npc turn his head north, then east , then west, and then north.
You can decide how long to wait before each turning of the head. Next make the npc walk to 1522, 890.
Finally I want him to repeat himself back to instruction 2.
Answer3
Now I'll show you what you can do with two npc. First place an old lady in the screen 4,4 and name her npc2 Place her on the path on the top right if you like it to be like in my quest.
Change your group script to:
#include <entity>
#include <general>
main()
{
SetString("npc1", 0, "I'm just walking!");
SetString("npc2", 0, "I'm just walking! I see a handsome old man!");
CallFunction("npc1", false, "WalkTo", "nnn", 1344, 1132, 0);
CallFunction("npc1", false, "WaitFor", "snn", "npc2", 4, 1);
CallFunction("npc1", false, "Say", "sn", "Good Day!", 2);
CallFunction("npc1", false, "WalkTo", "nnn", 1344, 1032, 3);
CallFunction("npc1", false, "WaitFor", "snn", "npc2", 4, 4);
CallFunction("npc1", false, "Say", "sn", "Get away from me!", 5);
CallFunction("npc1", false, "SetInstruction", "nn", 0, 6);
CallFunction("npc2", false, "WalkTo", "nnn", 1520, 1132, 0);
CallFunction("npc2", false, "Wait", "nn", 500, 1);
CallFunction("npc2", false, "WalkTo", "nnn", 1358, 1132, 2);
CallFunction("npc2", false, "Wait", "nn", 500, 3);
CallFunction("npc2", false, "WalkTo", "nnn", 1358, 984, 4);
CallFunction("npc2", false, "WalkTo", "nnn", 1520, 984, 5);
CallFunction("npc2", false, "SetInstruction", "nn", 0, 6);
}
Test it out awhile. npc1 will say Good Day when npc2 reaches instruction 4.npc1 will say Get away from me when npc2 reaches instruction 4 and npc1 finshed walking. You can practice with more npcs but just to let you know _npc1# are the only npcs that have walking abilities.
Lets make more scripts!In this section I'll explain globals, locals, SetItem, make entites invisible, make enties inactive, and much more. Not all of these scripts are tough, some of the script can be easy to understand.
Lets make a dungeon. In screen 4,4 name the door
todungeon and use the script for linking a
door.
Door Script
Note I will nolonger keep showing you basic script so make sure you read every part of the tutorial and listen to the instruction instead of looking for a script.
We'll use the green dungeon. Look at my example and try to copy my dungeon picture the best you can.
Screen 8,2 (snap to width off for fills to align) Screen 8,3

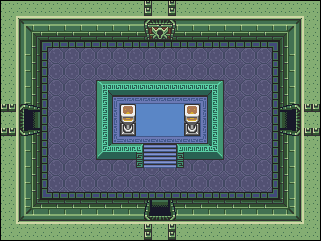
Screen 8,4 Screen 8,5
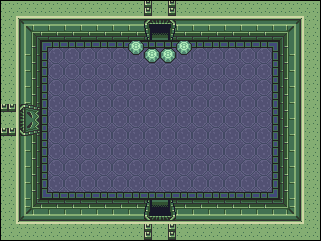
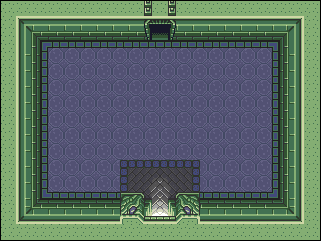
Make sure each screen is in its own group and the screen inside is checked for each screen. The reason I have

in each of the screens because we don't need to link every door. To cover it use this fill

. Name the entrance
gentrance. Don't forget to link
gentrance to
todungeon.
In screen 8,4 put a green guard and a blue guard in the screen. Name the green guard
g1 and name the blue guard
b1. Name the shutter
shut1 In this screen were going to have the green guard give a red rupee when
it dies and the blue guard will give whatever. Were also going to have the shutter open when both guards die! Here is the script for the screen:
#include <entity>
#include <general>
main()
{
if(FirstRun())
{
SetItem("g1","_itemrupeer");
}
if (isDead("g1") && isDead("b1"))
{
CallFunction("shut1", false, "Open", "NULL");
}
}
Ok now create this picture for screen 7,4
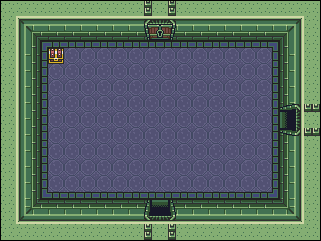
Name the chest
chest1 and put a _tentacle in the screen and name it
tent1. In this screen were going to make the chest not active and clear its collision until the enemy is dead.Use this script for the screen:
#include <entity>
#include <general>
main()
{
if(FirstRun())
{
SetItem("chest1","_itemkeys");
SetActiveFlag("chest1",false);
ClearCollisionRect("chest1",0);
}
if(isDead("tent1"))
SetActiveFlag("chest1",true);
}
If you try to clear the chest collisionrect while it's active it won't
really work because it's being set in the chest entity script. There are many different Set scripts:
SetItem
SetCollisionRect
SetHourCount
SetGlobal
SetLocal
and it keeps going
There are also many get but they are used with if commands
if(GetGlobal(#)==#)
if(GetLocal(#)==#)
if(GetHourCount()== #)
You would need to replace # with a number. There are many different functions and I can't show you all of them but I'll list a lot of them and tell you what they do.
Now lets create holes. First create this screen for screen 7,5
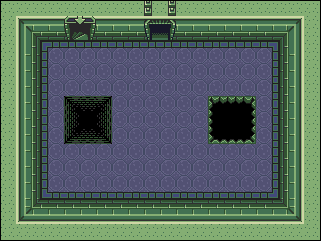
In the screen you see two different holes. These holes do nothing! We could have invisble holes but that would get annoying. I just have the sprites there so its not invisible. In your fill section you'll see two fill tiles. One has a H1 and the other has a H2. These are the two different types of holes.I'm sure you can guess which one hurts the player and which one takes you to a new screen.
Ok drag the H1 fill over the hole towards the right side of the screen. Now drag the H2 over the hole towards the left side of the screen. If you would test out the game now the right hole would hurt the player and the left hole would take you to screen 0,0. It takes you there because it's the default coordinates.
To script for which screen you want the player to fall to use this script:
#include <entity>
#include <general>
main()
{
if(FirstRun())
{
SetLowerLevel(7,7);
}
}
It won't work until you create screen 7,7. So create this screen for 7,7
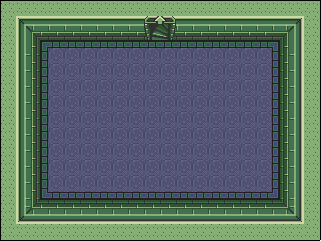
In screen 7,7 name the door
stairdoor1 and in screen 7,5 name the door
stairdoor1a. I hope you remember how to link doors because I'm not telling you how to link doors anymore! Go ahead and test it out now.
In screen 7,3 I'll show you what you can do with a spike enemy and doors
that need a bomb to open it. Create this screen
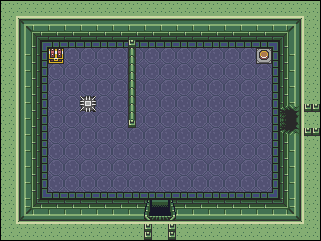
Name the chest chest2. For the chest's item _itembomb3 Name the spike spike1. Name the cracked door bombdoor1, and name the switch switch1. Now use this script for the screen:
#include <entity>
#include <general>
main()
{
if(FirstRun())
{
if(isOpen("bombdoor1a")&& !isOpen("bombdoor1"))
CallFunction("bombdoor1a",false,"OpenNow","null");
SetItem("chest2","_itembomb3");
}
if(isPushed("switch1"))
{
SetSpeed("spike1",0);
}
}
In screen
8,3 name the crack
bombdoor1a and use this script.
#include <entity>
#include <general>
main()
{
if(FirstRun())
{
if(!isOpen("bombdoor1a")&& isOpen("bombdoor1"))
CallFunction("bombdoor1",false,"OpenNow","null");
}
}
When the switch is pushed it will stop moveing the spike ball allowing the player to reach the chest without getting hurt. When the player opens the crack in 7,3 the crack in 8,3 will open right away. If you were to blow up the crack in 8,3 then the crack in 7,3 would open right away. In screen 9,3 I'll show you how to have a shutter open and close by checking the player's x and by stepping on a switch. Name the switch
switch2. Name the shutter
shut2.
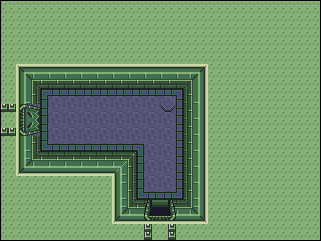
Now use this script for the screen:
#include <entity>
#include <general>
main()
{
if(FirstRun())
{
CallFunction("shut2",false,"Open","NULL");
}
if (GetX("player1") > GetX("shut2")+ 16 && GetLocal(0)!=1)
{
CallFunction("shut2",false,"Close","NULL");
}
if(isPushed("switch2"))
{
SetLocal(0,1);
CallFunction("shut2",false,"Open","NULL");
}
}
Take a look at this line:
if (GetX("player1") > GetX("shut2")+ 16 && GetLocal(0)!=1)
It saying here that if the player's x is above the door shut2 plus 16 and if the local does not equal 1 then do something.
Locals will always (#) == 0 every time the player enters the screen or group that has the script in it. Lets move on and do screen 9,4

Name the switch
switch3 and name the shutter
shut3 In this screen we'll make an enemy appear without putting one in the screen. I'm also going to use a local again. Now use this script for the screen:
I stopped here
#include <entity>
#include <entity>
new entity[20];// This is to give the entitiy an identifier.
main()
{
if(FirstRun())
CallFunction("shut3",false,"Open","NULL");
if (GetY("player1") < GetY("shut3") && GetLocal(0)== 0)
CallFunction("shut3",false,"Close","NULL");
if(isPushed("switch3")&& GetLocal(0) == 0)
{
SetLocal(0,1);
CallFunction("shut3",false,"Open","NULL");
}
if(GetLocal(0) == 1)
{
CreateEntity("_orbenemyb", 3114, 1108, entity);
SetLocal(0,2);
}
}
I want to explain some of the methods for this script. Take a look at this
line:
if(isPushed("switch2")&& GetLocal(0) == 0)
If you would take out GetLocal(0) == 0 then it will constantly create an
orb enemy as long as your standing on the switch.
The line
CreateEntity creates an entity on the screen and works like this.
CreateEntity("name of zes file",x coordinate, y coordinates,identifier);
Create this screen for 9,5
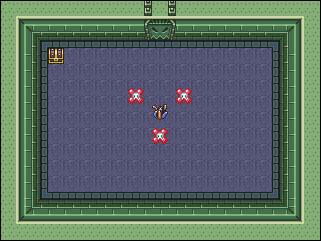
In screen 9,5 we'll create a mini boss.
The miniboss will be that _tentacle1. Now your thinking one shot and he's
dead. Well his HP can be changed with a script.
name the _tentacle1
tentminiboss,name the chest
masterchest,
and name the shutter
shut4.
Name the _bubbleenemyr
bubble1 bubble2 bubble3 it
don't matter which one you choose to be bubble1 or 2 or 3.
Use this script for the screen:
#include <entity>
#include <general>
main()
{
if(FirstRun())
{
CallFunction("shut4",false,"Open","null");
SetHealth("tentminiboss",500);
SetItem("masterchest","_itemkeym");
SetActiveFlag("masterchest",false);
ClearCollisionRect("masterchest",0);
SetActiveFlag("bubble1",false);
SetActiveFlag("bubble2",false);
SetActiveFlag("bubble3",false);
}
if(!isDead("tentminiboss"))
{
if(GetY("player1") >= GetY("shut4")+ 16)
CallFunction("shut4",false,"Close","NULL");
}// We just closed the if(!isDead("tentminiboss"))
else
{
SetActiveFlag("masterchest",true);
CallFunction("shut4",false,"Open","NULL");
}
if(GetHealth("tentminiboss")<= 350)
SetActiveFlag("bubble1",true);
if(GetHealth("tentminiboss")<= 200)
SetActiveFlag("bubble2",true);
if(GetHealth("tentminiboss")<= 100)
SetActiveFlag("bubble3",true);
}
This script might be long but don't be scared!
Let's look at parts of the script. Here take a look at this script
if(!isDead("tentminiboss"))
{
if(GetY("player1") >= GetY("shut4")+ 16)
CallFunction("shut4",false,"Close","NULL");
}// We just closed the if(!isDead("tentminiboss"))
This script is saying if tentminiboss is not dead and if the player's y
value is above the shutter's y value + 16 then close the door.
It would work the same even if you changed it to
if(!isDead("tentminiboss") && GetY("player1") >= GetY("shut4")+ 16)
{
CallFunction("shut4",false,"Close","NULL");
}
Now let's look at the next part of the script.
if(GetHealth("tentminiboss")<= 350)
SetActiveFlag("bubble1",true);
This script is saying for bubble1 to be active if the tentminiboss health
is less than or equal to 350
Let's do one last script for the dungeon. Use this script for screen 8,3 and try to figure out what you should name the doors and where it should go
in the script.
if(isOpen("masterdoor"))
{
SetGlobal(0,1);//This will be needed for our last script change
CallFunction("masterdoora",false,"Open","NULL");
}
SetGlobal(0,1) will always stay 0,1 unless if you change it with another script.
SetLocal(0,1) will always go back to 0,0 every time you leave the screen or
group script.
When you test it out and open masterdoor and you head to the next screen it should open with animation. It will also set our global SetGlobal(0,0); to SetGlobal(0,1); So test it out before looking at answer 4
Answer 4
Were done with the dungeon for now. Let's change the outside group script
for the screens 3,3 3,4 3,5 ...
Change your script a bit to look like this for your group script
if(GetGlobal(0) == 1)
{
SetString("npc1", 0, "So is this tutorial helping?");
SetString("npc2", 0, "Why don't the old man like me?");
}
else
{
SetString("npc1", 0, "I'm just walking!");
SetString("npc2", 0, "I'm just walking! I see a handsome old man!");
}
Answer5
When global 0 == 1 the two npc's will say something else.
Let's move on to our next scripting section were will learn how to shorten your script
In this lesson we'll learn about what #include<float> is used for. We'll also learn about #include<counter>
is used for. I'll show you how to shorten some of your scripts using new variables. Maybe I'll teach you some more but let's get started with this next lesson.
In screen 3,3 we had the screen get dark as soon as you entered the screen. It does not look right when it becomes night in a split second. We need to make it become night slower. So we'll use a timer script. A timer script will need float in order for it to work.Use this script for the screen.
#include <entity>
#include <entity>
#include <float>
new float: timer = 0.00;
main()
{
if(FirstRun())
{
}
if(GetHourCount() >= 12)// If the hour count is above or equal to 12:00 PM
{
timer += GetTimeDelta();
if(timer > 1 && timer <= 3)
{
SetHourCount(15);
}
else if(timer > 3 && timer <= 6)
{
SetHourCount(18);
}
else if(timer > 6 && timer <= 9)
{
SetHourCount(22);
}
else if(timer > 9 && timer <= 10)
{
SetHourCount(0);
timer =0.00;// sets the timer back to 0.00
}
}// ends if(GetHourCount() >= 12)
if(GetHourCount()== 22)
{
SetString("sign1", 0, "The time is 10 o'clock at night");
}
else// if the hour count does not equal 22
{
SetString("sign1", 0, "So how do you like this tutorial so far?");
}
}
Remember just because a script is long don't mean that its tougher it just means you have to be more carefull about making stupid mistakes.Before I explain this script I want you to add this script right below main().
ToString(floatround(timer), string);
DrawText(string, 120, 200, 255,255,255,255);
and add this right above main() of your script
new string[16];
So now if you done it right it should look just like this:
#include <entity>
#include <entity>
#include <float>
new float: timer = 0.00;
new string[16];
main()
{
ToString(floatround(timer), string);
DrawText(string, 120, 200, 255,255,255,255);
if(FirstRun())
{
}
.........
When you test it out it will tell you the rounded number for our timer.This little script we added tells us if our float is working. Let's look at this part of the script.
timer += GetTimeDelta();
Timer is a word that we told it to equal GetTimeDelta and for GetTimeDelta to increase.
If you would use this script:
timer -= GetTimeDelta();
The timer would go down. If you want to speed it up all you would need to do is this:
timer += 2 * GetTimeDelta();
* means multiply. Ok now let's look at this script:
DrawText(string, 120, 200, 255,255,255,255);
What does it mean your probably wondering. Well the word string will not work without ToString(timer, string); but instead of using string try using
"string" and you'll notice that the word
string shows up on the screen. Now let's look at this part:
120, 200, 255,255,255,255
The numbers stand for this
x,y,red,green,blue, transparent
The x and y in this script goes by the screen coordinates.
Screen coordinates
Screen Coordinates range from.. x = 0 - 640 y = 0 - 480. You can go past these coordinates if you want it t be drawn a bit off the screen.
Instead of using DrawText you can use DrawBitmapText for a bigger look.
Now let's use a counter script in screen 5,3 and place a _npc2 in the screen. I don't care which _npc2 you use.
Were going to have this npc tell you something if you have atleast 20 rupees. Use this script for the screen.
#include <entity>
#include <entity>
#include <counter>
main()
{
if(FirstRun())
{
SetCounterTarget("rupees",20);
}
if(GetCounterValue("rupees")>= 20)
{
SetString("moneynpc", 0, "I see that you have atleast 20 rupees, good for you.");
}
else
{
SetString("moneynpc", 0, "Go get atleast 20 rupees!");
}
}
I hoped you figured out that you had to name your npc2?
moneynpc. When you test it out you should have your rupees increase to 20 when you enter the screen. The npc should say the line about having 20 rupees. Now remove the line
SetCounterTarget("rupees",20); and watch him tell you to get 20 rupees.
Here are what each of the scripts are saying in this screen script.
if(GetCounterValue("rupees")>= 20)
That script is saying if the player has 20 ruppes or higher do something.
IncCounterTarget("rupees",20);
This script will add 20 rupees but if you put a - in front of 20 it will subtract 20 rupees.
If you would use SetCounterTarget("rupees",20); it will set the player's rupees to 20 nomatter how many rupees he has. he has. To instantly set the rupees to 20 you can use the script SetCounterValue("rupees",20) instead of having it increase/decrease to reach it's target.
Now were going to change the script were he'll tell the player a secret and then charge the player 20 rupees. He will not tell the player any secrets unless if the player has the money to begin with.
#include <entity>
#include <entity>
#include <counter>
main()
{
if(FirstRun())
{
MessageMap("moneynpc", 0, "Do you want to hear a secret for 20 rupees?` |no |yes", true, 1, 2);
MessageMap("moneynpc", 1, "Ok, Come back anytime!",false,0);
}
if(GetCounterValue("rupees")>= 20 && GetLastAnswer()==1)
{
MessageMap("moneynpc", 2, "Later in the tutorial I'll explain to you how to use the dungeon map.",false,0);
if(FinishedReading()&& GetLastAnswer()== 1)
{
IncCounterTarget("rupees",-20);// subtracts 20 rupees
}
}//ends the if the player has atleast 20 rupees
else
{
MessageMap("moneynpc", 2, "Sorry you don't have enough rupees!",false,0);
}
}
Put a 20 or 50 rupee somewhere in the group.
GetLastAnswer has some bugs but if used just right it will work.
GetLastAnswer()== 1 means if you pick the second choice. Example:
|no|yes|maybe|
yes is the second choice, maybe is the third choice, but no would be 0.
If we don't use GetLastAnswer it would take 20 rupees twice while talking.
I'll now teach you something that could be simple to use once you understand how it works.
InitTextBox("MESSAGE", 200, 0);
If you place it right below FirstRun it will run fine. Go ahead and add this script for screen 8,5 in the firstRun.
InitTextBox("Level1 `Our first dungeon", 200, 0);// the 200 is the height and the is the 0 is the priority
Basicly if it's really important and you want it to override any other text box set it to a 1. If you wanted this to show up after an enemy died you would need something some other variable.
In screen 8,4 change the script to this:
#include <entity>
#include <entity>
new message = false;
main()
{
if(FirstRun())
{
SetItem("g1","_itemrupeer");
}
if (isDead("g1") && isDead("b1")&& message == false)
{
InitTextBox("How dare you kill those guards!", 200, 0);
CallFunction("shut1", false, "Open", "NULL");
message = true;
}
}
If we don't set message to true the InitTextBox would stay on the screen and the player won't be able to move once the enemies are dead. The variable message can be change to any text.
The text true or false could be change to numbers.
Let's use another variable for making scripts shorter. Let's make screen 3,3 script shorter by changeing it to:
#include <entity>
#include <entity>
#include <float>
new float:timer = 0.00;
new Ghour;
main()
{
Ghour = GetHourCount();//We're telling the script that Ghour is the same thing as GetHourCount
if(FirstRun())
{
}
if(Ghour >= 12)// If the hour count is above or equal to 12:00 PM
{
timer += GetTimeDelta();
if(timer > 1 && timer <= 3)
{
SetHourCount(15);
}
if(timer > 3 && timer <= 6)
{
SetHourCount(18);
}
if(timer > 6 && timer <= 9)
{
SetHourCount(22);
}
if(timer > 9 && timer <= 10)
{
SetHourCount(0);
}
if(timer > 9)
{
timer =0.00;
}
}
if(Ghour == 22)
{
SetString("sign1", 0, "The time is 10 o'clock at night");
}
else
{
SetString("sign1", 0, "So how do you like this tutorial so far?");
}
}
I know there isn't much difference with that script but now I'll make a script that will be real short. Put a spikeball in screen 3,5 and name it
spike2. Make sure you get the spike ball to stay in the screen by placeing a fence towards the right side of the screen. Just make it long enough that the spike ends up going back and forth. Now use this script for the screen:
#include <entity>
#include <general>
new x;
new y;
new ex;
new ey;
new dir;
main()
{
x = GetX("player1");
y = GetY("player1");
ex = GetX("spike2");
ey = GetY("spike2");
dir = GetDirection("player1");
if(x > ex)
{
if(y > ey)
{
if(dir == east)
{
SetSpeed("spike2",50);
}
else if(dir == west)
{
SetSpeed("spike2",100);
}
else if(dir == south)
{
SetSpeed("spike2",20);
}
else
{
SetSpeed("spike2",10);
}
}
}
}
I hope this script wasn't confusing for you but it helps organize your long scripts more. When the player x and y is higher than the spike ball the spike ball will change speeds on depending which direction the player is facing. So test it out to see how it works.
Now I'll show you one other lesson you need to know when using new variables. If you put what the variable should equal in the firstRun it will only update it when you first enter the screen. Change your screen script to this:
#include <entity>
#include <general>
new x;
new y;
new ex;
new ey;
new dir;
main()
{
if(FirstRun())
{
x = GetX("player1");
y = GetY("player1");
ex = GetX("spike2");
ey = GetY("spike2");
dir = GetDirection("player1");
}
if(x > ex)
{
if(y > ey)
{
if(dir == east)
{
SetSpeed("spike2",50);
}
if(dir == west)
{
SetSpeed("spike2",100);
}
if(dir == south)
{
SetSpeed("spike2",20);
}
if(dir == north)
{
SetSpeed("spike2",10);
}
}
}
}
When you test it out you'll notice the spike ball stays the same.
Try entering the screen from different locations, different directions, and timings to change the speeds for the spikeball.
Get rid of the spikeball and the script for the screen because it was just a test!
In this section I'm going to talk about common mistakes. This is basicly for scripting but can happen with sprites. If you have been just copying and pasting my scripts and haven't been expirementing then your going to have some problems in the future. Most likely you'll add a extra { or an extra } and then you'll get a list of error(s) and won't know what to do. The first thing I need to tell you is don't panic if you get a huge list. Sometimes it's caused by just little problem.
Our first common problem are simple but you might not realize so I'm going to say...
Watch your caps! Set
String will work while Set
string won't!
Do not place entites that go over the borderline!
Do not place doors against a screen's edge!
You can do this with sprites but if you do it with entities it might now show up, especialy doors.
Second I'll show you how to read a script error.
location of problem (line number) [ErrorCode]; "what it expected", "what it found"
Ok, go to screen 3,3 and change the script to this:
***Same***
main()
{
Ghour = GetHourCount();//We're telling the script that Ghour is the same thing as GetHourCount
if(FirstRun())
{
{
}
***Same***
Now when you test your quest you should get this error.
questdata\KOHTutorial\scripts\3-3.zes(46) Error[001]; expected token: "}", but found "-end of file-"
Basicly all it's saying is it found an error on line 46 and expected to find a } but instead it was the end of the file. Well first of all if you add a } at the end of the file it will fix the error but will cause another problem.
if(FirstRun())
{
{
}
By adding an extra { you caused FirstRun to nolonger end. This means all your scripts will only run when you enter the screen. So be careful not to do this common mistake. Now put your script back to normal and now change it to:
***Same***
main()
{
Ghour = GetHourCount();//We're telling the script that Ghour is the same thing as GetHourCount
if(FirstRun())
{
}
}
***Same***
Now text your quest and look at the errors you have just made which should look like this.
(14) Error[010]; invalid function or declaration
(17) Error[010]; invalid function or declaration
(20) Error[054]; unmatched closeing brace
(21) Error[010]; invalid function or declaration
(24) Error[054]; unmatched closeing brace
(25) Error[010]; invalid function or declaration
(28) Error[054]; unmatched closeing brace
(29) Error[010]; invalid function or declaration
(32) Error[054]; unmatched closeing brace
(33) Error[010]; invalid function or declaration
(35) Error[010]; invalid function or declaration
(38) Error[010]; invalid function or declaration
(41) Error[054]; unmatched closeing brace
(42) Error[010]; invalid function or declaration
(45) Erorr[054]; unmatched closeing brace
Do you see how one little mistake can create a whole list of errors? You got all of these errors because you ended the main() script early. The best way to fix these errors is to open up the file. Then press ctrl + g and go to the line error in the first error listed. In this case it would be..
(14) Error[010]; invalid function or declaration
However there is nothing wrong with line 14 except for the fact there is a function outside of the main(). So if you notice that there are no problems with a line then go to the line above it, and keep going up until you see something that does not look right.
Ok, one last type of scripting mistake and this one will be a bit aggervating but can still be solved easily. Now change your script to this.
#include <entity>
#include <entity>
#include <float>
new float:timer = 0.00;
new Ghour;
main()
{
Ghour = GetHourCount();//We're telling the script that Ghour is the same thing as GetHourCount
ToString(Ghour,string);
DrawText(string,200,200);
if(FirstRun())
{
}
***Same***
When you test your quest this time you'll get an error that says:
One or more of your script has errors, Your QST file will not be built until you have these errors fixed.
It will not say the line number but it will show you the location of the file. Do you know what's wrong with this script? I'll give you a hint, it has to do with these two lines.
ToString(Ghour,string);
DrawText(string,200,200);
No idea still? Well it's because of the fact you do not have new string[16] above it. When you work with strings you must always make sure the string exists and it doesn't exceed the max characters allowed.
string[16] < this is allowing 16 characters which you can increase or decrease. Add
new string[16] above it. Once you get the error fixed just remove the script.
The last problem is the nameing problem. If you have two objects with the same name this will cause problems. Go back to screen 3,3 and change the sign's name to
moneynpc. Now go read the sign, and then talk with the npc. Both textboxes will be blank. Most likely it's because it don't know where to send the data to. With a simple script you can figure if and where that name exists. In screen 3,3 add this script to your screen.
new string[16];
ToString(GetX("moneynpc"),string);
DrawText(string,200,200);
ToString(GetY("moneynpc"),string);
DrawText(string,200,220);
Now test out your quest. At this point it will give the coordinates of the sign when you enter the screen. Change the name for the sign back to
sign1 and retest. Now you can easily find the coordinates for moneynpc. Now use your mouse to find the coordinates for moneynpc. So remember this trick incase if somethings not working right and it makes no sence. If the object doesn't exist it will give you a -999. So just to show you change the script to this:
new string[16];
ToString(GetX("test"),string);
DrawText(string,200,200);
ToString(GetY("test"),string);
DrawText(string,200,220);
The name test doesn't not exist so it returns a -999 like I said. Now put everything back to normal. I hope this section will help you in the future when you make common mistakes and have no idea what to do.
Tips
If your having trouble finding an error then use // in front of any line that might be causeing the error. This make it easier to find it without deleting any lines.
In our next lesson I'll teach you how to create sprites, fills, and animating sprites from a sheet. This lesson will hopefully help you when your creating a sheet from scratch. When making a sprite in a paint program, the color 255 green is for transparency. Sprites must be saved as a .bmp for it to work. Next thing I want to teach you is about the rules to follow when making sprites. Sprites sizes need to always divisble by 4. Examples are 4x4, 4x8, 8x8, 16x16. Basicly as long as it can be divided by 4 it's fine. This makes it easier to align basicly. So make sure to realign your graphics to make it more centered.
Make sure not to make a sprite border larger then the sheet. If you go past the edge of a sheet the sprite will not show up in the editor. So if you ever notice a sprite not showing up, make sure you check for this mistake.
Becareful of the names you choose for the sprites. If you have the same name for a sprite that's on the same sheet you will get a warning about this. This will help you in this case. However if the sprite exists on another sheet it will cause problems but not major ones. If you give it the same name, place it in a screen, and save it it will look the same. When you go back to the screen or test your quest it will change the sprite's graphics to the original one. So if this happens then just remember this rule, and change the name for the sprite.
This next rule is important.
Do not remove sprite sheets, sprites from sheets, or rename them! Don't get confused with sprites you placed in a screen. I'm talking about the sheets where they were created from. If you remove any of this, it will nolonger draw in the screen but the data will still exist. This will give you a lot more problems if you end up removeing sprites that represent an entity because of the nameing problem. Go to your graphics manager and remove the sheet
_OutsideSheet1. Now go to any screen and see how it looks. Remember the data still exists in the screen so now readd the sheet
_OutsideSheet1 and it will show up again.
The last rule is something that's not really important but might cause confusion. Normally you can not begin a sprite's name with a number. In _StandardMasks every mask starts with a number. The only way to do this is start the name with a letter and then open the .spt file in a notebook and edit the line. Basicly you won't need to do this even if your creating a mask.
If you ever have problems when making a sprite feel free to use this section for guidence or if your unsure of something.
In this section I'm going to teach you how to add new sprites to your managers and even create some new sprites. Let's add Whole hearts and heart pieces to your quest. Go to the folder extra and extract all of the files. I'm talking about your computer files, not your qd. Put the .zes files in the entity folder. Place the .bmp and .spt files in spritesheets. Also add the sound in the sound folder.
In the main screen on your quest click on
Quest Resources,
Graphics Manager.At this point we can either put it in a new folder or we can just add the file. Since it's only one sheet were not going to make a folder. Now choose add file to folder. Next choose hearts.
You should get a message of the entities on the sheet. In this case it should show
_fullheart and
_heartpiece. UnCheck the box for add any sounds from entity scripts. Most likely it will crash if you leave it. For the folder option choose the names
hearts Now choose the ok button.
If you have done it right the heart files should be added. Now go to your sound manager and add the sound heartpiece.wav. You can play the sound by double clicking on it. Music files can't be played like this.
At this point if you place the Full Hearts in a screen it will run just fine, but the heart pieces won't increase anything for the player. This is because it needs a counter. You can check the read-me but I'm going to explain it here. In the read me it tells you to add this line in the main script:
CreateCounterWithID(0, 4, "HeartPieces");// How many pieces of heart the player has
The main script it the main script for your quest basicly. Go to options, edit main script. In your main script you should be able to find the lines CreateCounterWithID for rupees, magic, keys, and some others. Just add the script underneath the last one and don't forget to save. Were not quite done yet. Your going to need to edit the entity script for _heartpiece so it will increase the health for the player. Go to your entity manager and open up the _heartpiece file. Now scroll down until you see these lines:
//----------------------------------------
// Name: ItemTake()
//----------------------------------------
ItemTake()
Now keep scrolling a bit further until you see the line
IncCounterTarget("HeartPieces", 1); and add this script after it.
// This is a heart, so update the players max health
if (GetCounterValue("HeartPieces") == 3)
{
SetMaxHealth("player1", GetMaxHealth("player1") + 100);
SetHealth("player1",GetMaxHealth("player1"));
IncCounterTarget("HeartPieces", -4);
}
Now your maxhealth will be increased by 100. 100 = 1 heart.
Next were going to have the heart pieces and masterkey to show up on the menu. Open up your _menulib. Now scroll down until you can find these lines.
if ( MenuGoingDown || MenuGoingUp )
MoveMenu();
DrawBorder( 10, 10 + Adj, 200, 80, 0 );
DrawBorder( 220, 10 + Adj, 200, 80, 0 );
DrawImage("_menu19", 20, 20 + Adj, 255, 255, 255, 255, 0, 200);
DrawImage("_menu18", 232, 22 + Adj, 255, 255, 255, 255, 0, 200);
DrawBorder( 10, 100 + Adj, 408, 364, 8 );
Add this script right underneath it!
DrawBorder( 440, 320 + Adj, 160, 120, 8 );
if (GetCounterValue("masterKey") == 1)
DrawImage("_itemkeym", 480, 360 + Adj, 255, 255, 255, 255, 0, 200 );
if (GetCounterValue("HeartPieces") == 0)
DrawImage("heartempty", 520, 360 + Adj, 255, 255, 255, 255, 0, 200 );
else if (GetCounterValue("HeartPieces") == 1)
DrawImage("heart14", 520, 360 + Adj, 255, 255, 255, 255, 0, 200 );
else if (GetCounterValue("HeartPieces") == 2)
DrawImage("heart24", 520, 360 + Adj, 255, 255, 255, 255, 0, 200 );
else if (GetCounterValue("HeartPieces") == 3)
DrawImage("heart34", 520, 360 + Adj, 255, 255, 255, 255, 0, 200 );
Now it will draw it on the menu. Let me explain the script that you just added.
DrawBorder( 440, 320 + Adj, 160, 120, 8 );
The 440 is a x coordinate and the 320 is a y coordinate for screen coordinates.
If you look a little higher in the menulib you'll see this line.
new Adj = ypos - MaxYPos;
This is for the scrolling when opening and closeing the menu basicly.
The 160 is the width and the 120 is the height.
The 8 is the color of border. There are two border colors red and green. So its 8 or 0. Look at this next part of the script!
if (GetCounterValue("masterKey") == 1)
DrawImage("_itemkeym", 480, 360 + Adj, 255, 255, 255, 255, 0, 200 );
It saying that if the player has one masterkey to draw an image. The drawimage is _itemkeym because that's the name of the sprite. Here is what all of the data in DrawImage stand for.
spritename[],x,y + adj,red,green,blue, transparent,rotation,size.
So if you change the 0 to 90 for rotation it would rotate right 90 degrees.
Size will change the size of the sprite. If its 200 size will be the same. So just for fun change the 200 to a 100 and watch how small the master key looks on the menu.
Now I'm going to show you how to create a sprite, animated sprite, and a little more on entity making. To help you learn I created a simple sheet for you to learn. Take the sheet KOHTutsheet and add it to the spritesheet folder. Now in your QD go to Quest Resources, graphics manager and choose Create New.
Now choose KOHTutsheet.
Making simple .spt files is very easy to do once you understand how it works.
Move your mouse so that your MouseX and MouseY are both at 0. Now drag with the left mouse button and have the width equal 16, and the height equal 16.
It should look just like this:

Now click on Sprite, create sprite. Right above each option has an explination of it's purpose so I'm not going to explain it in this tutorial. For the sprite code put
kohspr1. Leave the mask code blank. Have the background box checked. Last click on Redefine and choose OK. This last step isn't really needed but it helps it align it perfectly if it's slightly off. Now save your work and head back back to your main quest. Click on any screen and see if the sprite shows up for you. Now were going to do the same thing for the rest of the ground sprites except for the middle. Name the rest of the sprites
kohspr2,
kohspr3,
kohspr4, etc. To make things easier follow this diagram to help you figure out the names for all of the sprites.

Remember, if the boxes aren't aligned right then click on
redefine and then
ok. Next we'll create a fill tile. In the diagram where the X is at is where we'll create out fill. Create the box around it and then click on Sprite, create sprite. Name the fill
kohfill1 and have the boxes
Background sprite and
Display as fill tile checked. Now save it and see if it shows up. It should show up with the other fills on the right side.
The next thing I'll show you is how to create an animated sprite. This is a two step progress. First we'll need to name all three of the animations and then set up the animation and speed for the sprite.
Create borders around each flower. The size for each one should be 8x8. Give it the names KOHflower1, KOHflower2, and KOHflower3. Each sprite should have the background box checked. Now we're going to change the flower to an animation. Click on sprite, create animated sprite. You should now see all the names of your sprites on the right side. Click on KOHFlower1 and then click on add. Now do the same thing for KOHFlower2 and KOHFlower3. The animating speed for most objects will be a 5, and this is the case for the flower as well. So go ahead and click on the OK button and save your sheet. Feel free to test out your quest to see if they animate for you. It will not animate in the QD, you'll have to run your quest to see.
The last thing I'm going to teach you is how to add an entity to your quest and by useing a
param. When createing a sprite for an entity the name you give it
must match. This last entity were creating is a gold rupee and will be editing
_itemrupee# file in order for it to show up. Before we name this rupee I want you to open up your
_ItemSheet1 sheet and take a look at the rupees on the sheet. You should notice the sprites that have the box
sprite represents an entity checked all start with the name
_itemrupee. This is because of the entity file
_itemrupee#. The # is for params. The params g,b,r,and p have already been taking by these rupees. _itemrupeeg has the param g. _itemrupeeb has the param b. Do you understand how params and naming works? Hopefully you do because were about to start work on your gold rupee.
Open up KOHtutsheet again and put a box around the first rupee. Give it the name
_itemrupeey and
check the sprite represents an entity. The width will be 8, and the height 16. Make sure background sprite is unchecked. Since this is representing an entity, making it a background sprite to will make the sheet think it's missing an entity file to go with it. We used the letter y because g was already taken. Y will stand for yellow in this case.
Name the other rupees
_itemrupeeya and
_itemrupeeyb but do not check any box since it's not needed.
You are now done with making the sprites for this sheet but before we save it let's give the sheet a name. Click on Options, spritesheet properties and give it the name
KOHTutsheet. Now the name should show up when viewing the sprites in the editor. Now save your sheet. At this point your entity will not show up when testing your quest until we edit the entity for it. Open up
_itemrupee#. In the FirstRun section right after if ( param == 'p' ) I want you to add this script.
if ( param == 'y' ) // yellow/gold
{
SetImage("this", "_itemrupeey");
SetString("this", 0, "You found a Gold Rupee, this is worth a total of 200 rupees! Don't you feel happy?"); // Set a description for this item
AddAnimframe(itemAnim, 0, 0, "_itemrupeey");
AddAnimframe(itemAnim, 0, 0, "_itemrupeeya");
AddAnimframe(itemAnim, 0, 0, "_itemrupeeyb");
RupeeWorth = 200;
}
Remember, I said after, not inside. Confused on where to add this? Try to see if you can figure it out on your own, if not then check out
Answer 6
Now your rupee should show up and increase the player's rupees by 200. If you place it in a chest and open it you'll see the message about finding a gold rupee.
Let me explain some of the scripts in this file.
if ( param == 'y' ) < if the param is y then run this. More towards the top of the script you should see this line.
param = GetParam("this"); < This defines the param. The data for param comes from # for the name of the entity.
SetImage("this", "_itemrupeey"); < This does not draw the object to let you know. SetImage is used with the script GetImage(object[],img[]); to retreave the data from another script. This is how the object is drawn when the player opens up a chest.
CreateAnim(7, itemAnim); < This creates the animation for itemAnim and gives it a speed of 7.
AddAnimframe(itemAnim, 0, 0, "_itemrupeey"); < this adds the sprite _itemrupeey to the frame. If a frame of the animation does not align with the rest then you would need to adjust the 0,0 until it does. Still wondering more for creating an entity? Don't worry I will teach you this a little later in my tutorial but first I'll teach you about maps.
In the game LTTP when you entered a dungeon it displayed a map. Well in this lesson I'm going to teach you how to do it. Creating the map won't be too hard once you understand how it works.
First go to your extra folder and search for map. Now listen carefuly. Take the _compassitem#, _mapitem#, and the _maplib and place it in your entities folder. Do not add the _menulib because it will overwrite what we did earlier. Now add the mapsheet.bmp and mapsheet.spt to your spritesheet folder. Now we need to add these files to your quest. Now do you remember how to add the files to your qd? Well if you forgot then I'll reteach you once more. Go to your graphics managerm right click on a folder or Sprite Sheets in Project and add the file to folder. Then search for mapsheet and add it. Did you notice anything different this time? The other entities weren't added. This is because there are no sprites for it so your going to have to add it seperately.
Now go to your entity manager. This time were going to make a folder. Right click on Entities in project and choose create new folder. Give it a name of
Mapfiles and click ok. Now right click on the folder Mapfiles and add _compassitem#, _mapitem#, and _maplib.
If you looked at the Map read me and got confused then you'll need this section of the tutorial. First thing you'll need to do is edit your main script. The section in red is the section that will need changeing.
// Setup the item library - add different dropable items to it
CallFunction("_itemlib", false, "Init", "NULL");
CallFunction("_itemlib", false, "AddItem", "sn", "_itemheart", 50);
CallFunction("_itemlib", false, "AddItem", "sn", "_itemrupeeg", 50);
CallFunction("_itemlib", false, "AddItem", "sn", "_itemrupeeb", 20);
CallFunction("_itemlib", false, "AddItem", "sn", "_itemrupeer", 5);
}
if (CallFunction("_maplib", false, "HandleMap", "NULL") != 1)
{
if (CallFunction("_menulib", false, "HandleMenu", "NULL") != 1)
{
// Dont draw the hud if the menu is being drawn
// Draw the HUD at the top of the Screen
DrawHUD();
}
}
}
//----------------------------------------
// Name: DrawHUD()
//----------------------------------------
Next I want you to put this script in the FirstRun for screen 8,5
CallFunction("_maplib", false, "InitDungeon1", "null");
This script will enable the map when you enter the screen. Now test out your quest. During testing walk to screen 8,5 and press the WKey to load the dungeon map. Don't worry about it look like it's missing any sprites because were not done setting it up. Now in your group script for the outside I want you to add this script in the FirstRun.
CallFunction("_maplib", false, "ClearDungeonMap", "NULL");
You should have added it in the same script where you set up the walking script for the npc's. This script will disable the dungeon map. Since we left the dungeon it needs to be cleared. Now it's time to start work on your map. Open up your _maplib file in the entity manager. Scroll down to the bottom of the script until you see these lines.
//----------------------------------------
// Name: InitDungeon1()
//----------------------------------------
Do you notice the line
public InitDungeon1()? This is where the CallFunction
CallFunction("_maplib", false, "InitDungeon1", "null"); send and recieve the data.
if (GetValue("this", 0) == 1)
return;
This next part is saying, when this value 0 is equal to 1 do not go any further. It's set up like this because this needs to only run when the map has no data.
HighFloor = 0;
LowFloor = 7;
//defines which floors exist
FloorExist = {false, false, false, false, false, false, false, false};
****
//set the boss's room
SetBossRoom(0, 0, 0);
//set the big chest room
SetBigChestRoom(0, 0, 0);
The floors in this map go from 0 to 7. 0 is for the 4th floor, and 7 is for the 4th basement. Do not go adding more floors because there is a lot of data to be changed. FloorExist goes from 0 to 7 as well. If the floor exists then change it to true. This is to draw the floor bars when selecting which floor you want to view. SetBossRoom(0, 0, 0); and SetBigChestRoom(0, 0, 0); is for it to draw a skull on the map for the boss's room and a redline for the room with the chest. Now go ahead and edit these next lines to match mine.
HighFloor = 3;
LowFloor = 4;
//defines which floors exist
FloorExist = {false, false, false, true, true, false, false, false};
In our dungeon we have a 1st floor and a basement. 3 stands for the 1st floor and 4 stands for basement. That's also why we set the 4th and 5th value in the FloorExists. Remember the first number is 0 if there's any confusion why I said 4 and 5.
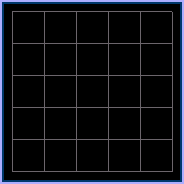
On your map you have 10 spaces to choose from for the x coordinate, and 10 spaces for the y. Yes, I know it's 5x5 blocks but each of those blocks draw 4 rooms. So that means you have 100 block spaces to work with for each floor. That should be plently of spaces for anyone to work with. Each block is 8x8px in OZ. To define what each map screen looks like you would have to mess with the FloorLayout.
//defines the layout of floor 4, instructions in readme (floor 0)
//		  Y		X 0  1  2  3  4  5  6  7  8  9
Floor4Layout[0] =	{ 0, 0, 0, 0, 0, 0, 0, 0, 0, 0};
Floor4Layout[1] =	{ 0, 0, 0, 0, 0, 0, 0, 0, 0, 0};
Floor4Layout[2] =	{ 0, 0, 0, 0, 0, 0, 0, 0, 0, 0};
Floor4Layout[3] =	{ 0, 0, 0, 0, 0, 0, 0, 0, 0, 0};
Floor4Layout[4] =	{ 0, 0, 0, 0, 0, 0, 0, 0, 0, 0};
Floor4Layout[5] =	{ 0, 0, 0, 0, 0, 0, 0, 0, 0, 0};
Floor4Layout[6] =	{ 0, 0, 0, 0, 0, 0, 0, 0, 0, 0};
Floor4Layout[7] =	{ 0, 0, 0, 0, 0, 0, 0, 0, 0, 0};
Floor4Layout[8] =	{ 0, 0, 0, 0, 0, 0, 0, 0, 0, 0};
Floor4Layout[9] =	{ 0, 0, 0, 0, 0, 0, 0, 0, 0, 0};
To make the map images your going to need a calculator or you could have OZ do the match for you but it would make the lines extra long. Now I want you to look at these lines.
1 = entrance
2 = south wall stairs
4 = north wall stairs
8 = 6x6 small rooms
16 = 7x7 bottom-left corner of large rooms
32 = 7x7 top-left corner of large rooms
64 = 7x7 bottom-right corner of large rooms
128 = 7x7 top-right corner of large rooms
256 = 8x8 whole-unit
512 = 2x5 north-pointing - for doors, T-junctions, + junctions, passage corners, dead ends, etc
1024 = 2x5 east-pointing - for doors, T-junctions, + junctions, passage corners, dead ends, etc
2048 = 2x5 south-pointing - for doors, T-junctions, + junctions, passage corners, dead ends, etc
4096 = 2x5 west-pointing - for doors, T-junctions, + junctions, passage corners, dead ends, etc
If one of your dungeon rooms looked like a one screen room with no doors the answer would be:
8. It would be 8 because it's just a small room. If you had a square room with a north door and an entrance the answer would be:
521. Now your probably wondering where that answer came from. Well it's very simple. Take a look at these lines.
1 = entrance
8 = 6x6 small rooms
512 = 2x5 north-pointing - for doors, T-junctions, + junctions, passage corners, dead ends, etc
So all you would have to do is to add 1 + 8 + 512 and you would get 521. Now were going to create the dungeon map for our dungeon. I want the dungeon map to be as center as possible and to start on the bottom row. For it to start on the bottom row scroll down to Groundfloor(floor 3) and keep scrolling until you reach this line.
Floor1Layout[9] = { 0, 0, 0, 0, 0, 0, 0, 0, 0, 0};
To keep the map centered were going to edit the 5th number here which starts with 0. Take a look at screen 8,5. What do you think the forumula will be? Well it's a small room, with an entrance, and a north door. So the forumula will be 1 + 8 + 512 which equals 521. So change the line to look like this.
Floor1Layout[9] =	{	0,	0,	0,	0,	521,	0,	0,	0,	0,	0};


You have now entered the data for that room but it will not show up yet. This is because it has no idea if the player enters the room or not. Were going to need to use the CallFunction SetPlayerPosition(x, y, z). x and y is the cell coordinates, not the screen or world coordinates. The z value is for the floor. Remember it's 0 - 7 starting from the 4th floor. Instead of me just giveing you the CallFunction I want you to create this one. Turn SetPlayerPosition(4, 9, 3) into a CallFunction. Go to screen 8,5 and add the script in the FirstRun. You forgot already to create a CallFunction? Well here is a link so you can see how CallFunctions work. CallFunction Lesson. Also the public script for npc walking was public WalkTo( x, y, instruction ) so hopefully that will help you in this case.

Answer

If you needed to check the answer, don't worry about it, since I will teach you this a bit more yet. Now go ahead and test out your quest. Now let's move onto screen 8,4 and create a map for that screen. Ok, we have a small room with a north, south, and west door.

8 = 6x6 small rooms

512 = 2x5 north-pointing - for doors, T-junctions, + junctions, passage corners, dead ends, etc

2048 = 2x5 south-pointing - for doors, T-junctions, + junctions, passage corners, dead ends, etc

4096 = 2x5 west-pointing - for doors, T-junctions, + junctions, passage corners, dead ends, etc

So all we have to do is add 8 + 512 + 2048 + 4096 and you'll get 6664.
This screen is located right above the last one so the data will look like this.


Floor1Layout[8] = { 0,0,0,0,6664,0,0,0,0,0};


The map coordinates are 4,8,3. Do you see the 8 in the line Floor1Layout[8]? Also at the top notice how the X's go from 0 - 9. This is where the 4 came from. The 3 came from the floor. Which goes from 4th to basment 4. Since I basicly repeated myself hopefuly that will help you understand how this works.
Now I need you to put SetPlayerPosition(4, 8, 3) into a CallFunction in screen 8,4 in the FirstRun. So it would be CallFunction("_maplib",false,"SetPlayerPosition","nnn",4,8,3);

Now I'm going to start having you do this on your own. Hopefuly you got the hang of how this works a bit. Go to screen 7,4. What do you think the forumula will be? Where do you think the data should go? It's a small room with north, east, and south doors. For the coordinates use SetPlayerPosition","nnn",3,8,3); So hopefuly this will help you out a bit because things will start to get a little tougher from here on.

Answer8

Did you get it? I hope so because I'm going to speed it up a bit. In screen 7,5 it's not going to look normal but that is fine. What I mean is we can't really have a north door and a north stairs but since we have a south door in the screen above it will still make it acurate. For screen 7,5 we have a north stairs, and a small room. So create the forumula for this room along with the screen script. Now I want you to create the formula and screen script for 7,3 8,3 , 9,3 , 9,4 , and 9,5. I'm going to help you a bit with 7,3 , 8,3 , and 9,3.

7,3 - small room with south and east doors.

8,3 - small room with north, west, east, and south doors.

9,3 - room with west and south doors. This room will look like a rotated L.

The rest of the rooms shouldn't be hard to figure out. When your finished your map should look like this picture.


Want a Tip?

Don't like doing all of those calculations? Well you could always write some of the formulas for rooms down. A small room with a north door would be 8 + 512 which equals 520. So in a notepad or _maplib put this line.

//520 - Small room with north door.

This helps me get the room done faster and with less calculations.

So do your rooms look like my map? Remember you have to walk through every room to get it to show up.

Answer 9

Now we only have one last screen to map. Screen 7,7 is located in the basement. The screen 7,7 is right below 7,5 in the dungeon. The coordinates for 7,7 was 3,9,3. The 3 that is bolded is for floors. The number for Basement1 is a 4. So in screen 7,7 your going to need to use the coordinates 3,9,4. Now in your _maplib go to this line.


Basement1Layout[9] ={ 0,0,0,0,0,0,0,0,0,0 };


Now create the room for a small room and north stairs. I hope you could figure out that it should look like this.

Basement1Layout[9] ={	0,0,0,12,0,0,0,0,0,0 };


Congradulations you got through with making the map screens. Now we'll work on the mapitem, compass, bigchest, and bossroom which won't be hard. The first thing I want you to do is to place two chests in screen 8,4 and name it mapchest and name the other one compasschest. Now change the screen script to this script.

#include <entity>

#include <general>

main()

{

	if(FirstRun())

	{

	SetItem("g1","_itemrupeer");

	CallFunction("_maplib", false, "SetPlayerPosition","nnn", 4,8,3);

		SetItem("mapchest","_mapitem1");

		SetItem("compasschest","_compassitem1");

		if(!isOpen("mapchest"))

		{

		SetActiveFlag("mapchest",false);

		ClearCollisionRect("mapchest",0);

		}

if(!isOpen("compasschest"))

		{

		SetActiveFlag("compasschest",false);

		ClearCollisionRect("compasschest",0);

		}

	}

if (isDead("g1") && isDead("b1"))

{

	if(!isActive("mapchest"))//this will only run if not active

	SetActiveFlag("mapchest",true);

if(!isActive("compasschest"))//this will only run if not active

	SetActiveFlag("compasschest",true);

CallFunction("shut1", false, "Open", "NULL");

}

}

_mapitem# is the entity file for the map setup. All you have to do is match the # with your dungeon number. This dungeon is our first dungeon so we gave it a param of 1. You have the numbers 1 - 9. You can set it up for letters but you'll have to edit the file. In your _maplib you should see this line.

SetValue("this", 0, 1); This is why we used _mapitem1. If we would of used SetValue("this", 0, 1); then we would have to use _mapitem2. It works the same way for the compass item. If you tested your quest and got the map it should of showed all of the screens.

The compass won't do anything at this point since we did not tell the dungeon the screens for the bigchest and the dungeon boss. So we'll work on that soon. First I want you to add some last minute objects to our dungeon.

Go to your spritesheet _ChestSheet1 and create the sprites for the big chest. Name it _chest2 and _chest2a. Next load the file _chest# into your entity manager, last remove _chest1 from your entity list. If you don't remove it one of the files will override the other one. Your big chest should work fine and will not open without a masterkey. Did you remember that you have to check the entity box for _chest2? Place the big chest in screen 8,3 and name it bigchest.
Just place it between the two tourches, doesn't really matter though. Use SetItem("bigchest","_gloveitem1"); This item will allow the player to lift heavier objects.

Now were ready to define it on the map. Now in your _maplib update the lines to these lines.

//set the boss's room

SetBossRoom(4,6,3);

//set the big chest room

SetBigChestRoom(4,7,3);

We haven't created any boss yet but were going to put a boss in screen 8,2 but not in this lesson. If you open up the big chest or defeat the boss it will still show up on your map.

That's basicly it for this lesson. If you wanted to create another dungeon map all you would have to do is use the same methods as InitDungeon1 but give the public script a different name. public InitDungeon2() would be a good name to choose. Just don't forget to use this script for it.

CallFunction("_maplib",false,"InitDungeon2","null");

If the public and the callfunction do not match it will not run.
In this lesson I'm going to show you how to create an entity from scratch. To make our quest complete were going to create a new boss. First I want to teach you about some of the scripts were about to use. The public script that is used with all enemies is this script.
public HitByWeapon(wtype[], damage, x, y)
This script is used with this script.
CallFunction(entity[],false,"HitByWeapon","snnn",wtype[],damage,x,y);
Do you remember from our other lessons that s is for strings and n is for numbers? This is important to know when making public scripts. Open up your _swordweapon1.zes file and scroll down to the section
CheckForHit(). This is where it checks for all the entities that are in the game and checks to see if it matches the configurations. It's checking to make sure the entity is active, not a player type and if it collided with the sword. Also it has to be within 80px from this object. If the entity matches this then it runs the CallFunction.
The next thing that is used in a lot of entities scripts are
case and switch. This is basicly for if,else if, and else statements but with more organiation. Take a look at this example.
switch(GetGlobal(1))
{
case 0:
//if Get Global(1) equaled 0 run this line
case 1:
//if Get Global(1) equaled 1 run this line
case 2,3:
//if GetGlobal(1) equals 2 or 3 run this line
}
Now we'll start working on the boss. First we'll need to create the sprites (not gfx). Go to your tutorial folder and add the file
KOHBoss to your spritesheet folder.
Remember how to create a new .spt file? Go back and read the section
Adding/Creating Objects to your quest. Now follow this diagram for the data.

1. Name: e_kohboss and check the box for entity
2. Name: e_kohbossh
3. Name: e_kohbossha
4. Name: e_kohbossl
5. Name: _iceball
6. Name: _iceballa
Don't check any of the boxes except the one I told you to check. Next we are going to script the boss e_kohboss. I'm going to make this boss as simple as I can so it will be easier to understand. Go to your entity manager and choose
Create New. Have an idea for the name? Well if you guessed
e_kohboss then your correct. Remember the script name has to match the sprite's name if it's reperesting an entity. If we placed our boss in the game, right now it would do nothing. So first thing I'll have you do is make the boss show up when testing.
By now I hope you know what I mean when I say after, before, and inside otherwise you might get lost. I'll show you quickly but afterwords I'm nolonger explaining it. Put this script after the FirstRun.
new x = GetX("this");
new y = GetY("this");
if (isVisible("this"))
PutSprite("e_kohboss",x,y,1);
I said after, so it should look like this:
if (FirstRun())
{
}
***script here***
Don't forget that you need to have #include
and #include for it to work without any errors. Now place the boss in the hole, make it as even as possible but no need for perfection. Change your player's starting position to anywhere in this screen. Otherwise it will take you a while to see what you have done so far. Now when you test your quest the boss should show up, and nothing else.
Next we will set up some of the variables and the FirstRun for the boss. This part only runs once when loading your quest. Now add this script to your boss. Put these lines before main()
#include <animation>
new MainImage[20] = "e_kohboss";
new MainHImage[20] = "e_kohbossh";
new DeadAnim[20];
The names e_kohboss and e_kohbossh will be needed a few times in our quest, so to keep it organized were useing a string. The 20 means that it can have up to 20 characters, can be increased or decreased. Now here's the scripting for the FirstRun.
if (FirstRun())
{
CreateAnim(8, DeadAnim);
CallFunction("_enemylib", true, "CreateDeathAnim", "s", DeadAnim );
SetActiveDist("this", 320);
SetType("this",enemyType);
SetSpeed( "this", 0);
SetDamage("this", 50);
}
Now to explain some of these scripts.
CreateAnim(8, DeadAnim); - This creates the death animation for the enemy and gives it an animated speed of 8.
CallFunction("_enemylib", true, "CreateDeathAnim", "s", DeadAnim ); - This reads the public function CreateDeathAnim and sends the data to it. This function created the animation for the enemy's death.
SetActiveDist("this", 320); - Tells the entity to run only if it's within 320 px of the screen's coordinates. 320 is very common. Useing a -1 means it will not run, which is used for weapons. -2 means it will always run aslong as it's in the same group.
SetType("this",enemyType); - Set's the type to enemy. This is important because weapons usualy check for if it collides with an enemy type. Check your entity.inc file for all the avaible types. Also you can add more to the list.
I'm sure you can figure out what SetDamage and SetSpeed does so I'm skipping this part.
You can test again if you like but nothing will look different but best to check to make sure you have no errors. Now were going to use switch and case for this next part. I showed you earlier how it works so I'm going to have you do part of this lesson. So place this script after the FirstRun and doesn't matter if it's before or after the other script we added earlier.
switch(GetState("this"))
{
***place cases here***
}
Now use these cases.
case standing:
Stand();
case walking:
Stand();
Still with me? If so then see if you can add these last two. For the case hit put Hit();. Last for the case dying put Die(); Since the boss is not going to move around all we need is for it to stand there. If you didn't get the scripting right then you may get the answer here.
Answer 10
At this point you can not test because your going to get some errors. So now I'll show you the functions you need to make to complete your script so it won't give you an error. Place this script after main(). I do not mean inside of it, I mean after your entire script.
//----------------------------------------
// Name: Stand()
//----------------------------------------
Stand()
{
}
Now you just linked the function Stand(); with Stand(). This helps organize your scripting more instead of having a lot of unorganized if functions. The lines above Stand() is just to make it neater, which you will notice in a lot of entity scripts. Now I want you to link the function Hit(); with Hit() and Die(); with Die(). Cases must match! Otherwise it will give you an error. You do not need the lines with the // unless if you want to make it look more organized. Now test your quest to see if you did it right. If you get no errors then you did it correct.
Answer 11
Next we'll work on Stand() for when the boss is standing or walking. No need to set it's state to walking but if we did, it would run this same function. Remove these lines from the main()
new x = GetX("this");
new y = GetY("this");
if (isVisible("this"))
PutSprite("e_kohboss",x,y,1);
Will place them in the stand() soon but we need to add more scripting first. Use this script for stand().
Stand()
{
new x = GetX("this");
new y = GetY("this");
new width = GetWidth(MainHImage);
new height = GetHeight(MainHImage);
new adj = 2;
if(GetPauseLevel()== 0)
timer1 += GetTimeDelta();
if(timer1 >= 4.5)
{
if(timer1 >= 5)
{
//shoot iceball
timer1 = 0.00;
}
if(isVisible("this"))
PutSprite("e_kohbossha",x + 6,y,y + height);
}
else
{
if(isVisible("this"))
PutSprite(MainHImage,x + 6,y,y + height);
}
if(isVisible("this"))
PutSprite("e_kohbossl",x,y + 20,1);
}
Make sure you create a float for timer1 at the top and don't forget the line #include <float>. Now in this script we made the boss's head have a closed mouth if the timer is below 4.5 seconds. If the timer is equal above 4.5 draw the mouth opened. The name "e_kohbossl" is for drawing the legs which will stay the same at all times. The y + height is for giving the sprite some depth. This means if you would walk above the boss, the player would appear behind it. If your wondering why I put y + 8 for the boss's legs, it's so it would align properly. I tested it a few times until I got it aligned perfectly. Also looking at the difference in size in the graphics manager can help to.
Now that you got the boss to draw, will set up the collision for the boss and for it to hurt the player. SetCollisionRect is the command to set up collisions. You can have up to 4 collisions for an entity.
At the botton of Stand() put this script.
SetCollisionRect("this",0,false,x + 6 + adj, y + adj, x + 6 + width - adj, y + height - adj);
Usualy collisions are slightly smaller, so that is why I added the adj. I used x + 6 because that is the amount of pixels we adjusted the head for the enemy. The 0 is the index, you can have 0 - 3 which means you can have four collisons like I said. The false means the collision is not solid so the player can go through. Now for it to hurt the player, just add this line at the before switch() part but you can do it after if you want.
// Check for a collision with the player
CallFunction("_enemylib", true, "CheckForPlayer", "NULL");
This basicly checks to see if it collided with the player, and to lower the player's health. Now if you test your quest, and it hurts the player by 50 (half a heart) then you did it correctly. BTW with the hold being there, you can only touch it from the south without falling.
Were about halfway done with this boss now. Now we will work for hurting the boss. The first thing we need to do is add the public function for checking to see if this boss gets hit by a weapon. So add this script before Hit() but you can add it anywhere you like aslong as it's not inside of any of the functions.
//----------------------------------------
// Name: HitByWeapon(wtype[], damage, x, y)
//----------------------------------------
public HitByWeapon(wtype[], damage, x, y)
{
HitCount = 0.00;
CallFunction("_enemylib", true, "BeginHit", "nnn", damage, x, y );
}
Make sure you add a float for HitCount or you'll get an error. In this public function you can check to see what type of weapon it's being hit by, check or change the damage to hurt the enemy, and/or check the x and y coordinates of the weapon. Will mess with this soon, but first let's set up the Hit() section. Now use this script.
Hit()
{
new colors[5][3] = { {19,125,19}, {253,211,65}, {225,88,5}, {32,211,238}, {238,32,32} };
new width = GetWidth(MainHImage);
new height = GetHeight(MainHImage);
new x = GetX("this");
new y = GetY("this");
// Draw the enemy
if (isVisible("this"))
{
PutSprite(LastImage, x + 6, y, y + height, 0, colors[ floatround(HitCount * 20.0) % 5 ][0], \
colors[ floatround(HitCount * 20.0) % 5 ][1], \
colors[ floatround(HitCount * 20.0) % 5 ][2], 255, 0, 100);
PutSprite("e_kohbossl", x, y + 20, 1, 0, colors[ floatround(HitCount * 20.0) % 5 ][0], \
colors[ floatround(HitCount * 20.0) % 5 ][1], \
colors[ floatround(HitCount * 20.0) % 5 ][2], 255, 0, 100);
}
// Check the hit counter
HitCount += GetTimeDelta();
if (HitCount >= 0.23)
{
// Leave the Hit state
SetState("this", standing);
SetSpeedMod("this", 0);
}
}
Now before you panic, these formulas are used with every enemy in these zelda quests. So even if you don't understand how it works, you can easily copy and paste it each time.
new colors[5][3] = { {19,125,19}, {253,211,65}, {225,88,5}, {32,211,238}, {238,32,32} }; - This is for making the enemy flash these rbg colors.
(HitCount * 20.0) % 5[0] - This takes HitCount and multiplys it by 20. Then it divides it by 5 and the remainder of that. *do screen scripting to understand better*.
Now we need to go back and add the LastImage to make it a bit organized. At the very top add the line new LastImage[20];. Now in the HitByWeapon section add these lines anywhere in the section
if(timer1 >= 4.5)
LastImage = "e_kohbossha";
else
LastImage = MainHImage;
We could add this in the Stand() instead but it's not really needed so it's your choice. Now you should be able to hurt the boss. At this point if the boss's HP runs out it's state will be set to dying. This is what the "BeginHit" does in the check for weapons. Next will set up the dying part for the boss. This part is simple, so use this script first.
Die()
{
new x = GetX("this");
new y = GetY("this");
new height = GetHeight(MainHImage);
// Draw the enemy standing still
if (GetAnimCount(DeadAnim) < 5)
{
if(isVisible("this"))
{
PutSprite(LastImage,x + 6,y,y + height);
PutSprite("e_kohbossl",x,y + 20,1);
}
}
// Overlay the death animation over the enemy
CallFunction("_enemylib", true, "HandleDying", "ss", DeadAnim, MainImage);
}
This part draws the boss's last image that it used, and draws the death animation in front of it. Then the boss will be set to be dead, and inactive. The reason we used MainImage for the HandleDying is because we need to make it as centered as possible. At this point the boss will still show up when dead, so we need to add one more scripting line to make it perfect. Right after the FirstRun add these two lines.
if(!isActive("this")|| isDead("this"))
return;
Now the boss will nolonger show up when inactive or dead. Were almost done scripting our boss. This last part will be simple. Back in the stand() where we have the line //shoot iceball is where we'll create the iceball. Now this is a simple few lines script but I want to show you another method for functions. Replace that line with this script.
Shoot(x + 20,y + 32);
Now anywhere in your boss script add this script.
Shoot(x,y)
{
new entity[20];
new angle;
CreateEntity("_iceball",x,y,entity);
angle = CalculateAngle(x + 8, y + 8, GetX("player1") + 8, GetY("player1") + 8);
if(angle > 330 || angle < 90)
angle = 330;
else if(angle < 210)
angle = 210;
SetMoveAngle(entity, angle);
}
Remember this method if you use certain varibles over and over, and don't want to keep redefining it. CalculateAngle returns the angle for the first x and y coordinates to the second x and y coordinates. Since it would look weird if the boss could shoot the iceball in any angle I added some if statements to prevent this. So if the angle is above 330 it will shoot out at 330 for the angle. If the angle is equal below 330 and equal above 210 is will move towards the player when first shot.
Now take the _iceball.zes from our tutorial and add it to your quest. I already scripted this for you but you can look it over to see what methods I used.
Well, congradulations you just finished scripting a simple boss.
Now put your starting position to 154, 120. Next put your quest name as KOH Tutorial. Last check the box final version. This will make a title apear at the begining when loading your quest. Now that you finished your quest you may choose write quest file to write the actual quest and upload it to the web. Not needed though unless if you want to show everyone how good you did with it. Now that you learned how to do this you should be able to start making npc's, and more enemies, and maybe some more bosses but it will take more practice.
Here are all the answers from my tutorial!
Answer1
#include <entity>
#include <general>
main()
{
if(FirstRun())
{
SetHourCount(22);
SetString("sign1", 0, "So how do you like this tutorial so far?");
}
}
back
Answer2
There are a few answers for this one but I'll show you only two.
#include <entity>
#include <general>
main()
{
if(FirstRun())
{
SetString("npc1", 0, "Hello there young fellow.");
}
}
Or you could do this:
#include <entity>
#include <general>
main()
{
SetString("npc1", 0, "Hello there young fellow.");
}
If you place it in the main though it will keep setting this message. So useing
the FirstRun is probably better.
back
Answer3
#include <entity>
#include <general>
main()
{
CallFunction("npc1", false, "WalkTo", "nnn", 1344, 1132, 0);
CallFunction("npc1", false, "Wait", "nn",1000, 1);
CallFunction("npc1", false, "WalkTo", "nnn", 1344, 990, 2);
CallFunction("npc1", false, "WalkTo", "nnn", 1522, 990, 3);
CallFunction("npc1", false, "Say", "sn", "I'm a Wacko!", 4);
CallFunction("npc1", false, "Wait", "nn",1000, 5);// This don't have to be 1000
CallFunction("npc1", false, "SetHeadDirection","nn",north, 6);
CallFunction("npc1", false, "Wait", "nn",1000, 7);// This don't have to be 1000
CallFunction("npc1", false, "SetHeadDirection","nn",east, 8);
CallFunction("npc1", false, "Wait", "nn",1000, 9);// This don't have to be 1000
CallFunction("npc1", false, "SetHeadDirection","nn",west, 10);
CallFunction("npc1", false, "Wait", "nn",1000, 11);// This don't have to be 1000
CallFunction("npc1", false, "SetHeadDirection","nn",north, 12);
CallFunction("npc1", false, "Wait", "nn",1000, 13);// This don't have to be 1000
CallFunction("npc1", false, "WalkTo", "nnn", 1522, 890, 14);
CallFunction("npc1", false, "SetInstruction", "nn", 2, 15);
}
back
Answer 4
#include <entity>
#include <general>
main()
{
if(isOpen("masterdoor"))
{
SetGlobal(0,1);//This will be needed for our last script change
CallFunction("masterdoora",false,"Open","NULL");
}
}
Name the masterkeydoor
masterdoor and name the masterkeydoor in screen 8,2
masterdoora
Back
Answer 5
#include <entity>
#include <general>
main()
{
if(GetGlobal(0) == 1)
{
SetString("npc1", 0, "So is this tutorial helping?");
SetString("npc2", 0, "Why don't the old man like me?");
}
else
{
SetString("npc1", 0, "I'm just walking!");
SetString("npc2", 0, "I'm just walking! I see a handsome old man!");
}
CallFunction("npc1", false, "WalkTo", "nnn", 1344, 1132, 0);
CallFunction("npc1", false, "WaitFor", "snn", "npc2", 4, 1);
CallFunction("npc1", false, "Say", "sn", "Good Day!", 2);
CallFunction("npc1", false, "WalkTo", "nnn", 1344, 1032, 3);
CallFunction("npc1", false, "WaitFor", "snn", "npc2", 4, 4);
CallFunction("npc1", false, "Say", "sn", "Get away from me!", 5);
CallFunction("npc1", false, "SetInstruction", "nn", 0, 6);
CallFunction("npc2", false, "WalkTo", "nnn", 1520, 1132, 0);
CallFunction("npc2", false, "Wait", "nn", 500, 1);
CallFunction("npc2", false, "WalkTo", "nnn", 1358, 1132, 2);
CallFunction("npc2", false, "Wait", "nn", 500, 3);
CallFunction("npc2", false, "WalkTo", "nnn", 1358, 984, 4);
CallFunction("npc2", false, "WalkTo", "nnn", 1520, 984, 5);
CallFunction("npc2", false, "SetInstruction", "nn", 0, 6);
}
Back
Answer 6
I hope you didn't need to check, if you did your going to need to practice more basic scripting on your own.
The red part was the part that was added.
if ( param == 'p' ) // purple
{
SetImage("this", "_itemrupeep");
SetString("this", 0, "You found a Purple Rupee, this is worth a whopping 50 rupees!"); // Set a description for this item
AddAnimframe(itemAnim, 0, 0, "_itemrupeep");
AddAnimframe(itemAnim, 0, 0, "_itemrupeepa");
AddAnimframe(itemAnim, 0, 0, "_itemrupeepb");
RupeeWorth = 50;
}
if ( param == 'y' ) // yellow/gold
{
SetImage("this", "_itemrupeey");
SetString("this", 0, "You found a Gold Rupee, this is worth a total of 200 rupees! Don't you feel happy?"); // Set a description for this item
AddAnimframe(itemAnim, 0, 0, "_itemrupeey");
AddAnimframe(itemAnim, 0, 0, "_itemrupeeya");
AddAnimframe(itemAnim, 0, 0, "_itemrupeeyb");
RupeeWorth = 200;
}
Back
Answer 7
The script could be placed outside if the FirstRun but there's no point in having it run constantly.
#include <entity>
#include <general>
main()
{
if(FirstRun())
{
SetString("gentrance",0,"toentrance");
CallFunction("_maplib", false, "InitDungeon1", "null");
CallFunction("_maplib", false, "SetPlayerPosition","nnn", 4,9,3);
}
}
Back
Answer 8
The screen script for screen 7,4 should be this.
if(FirstRun())
{
CallFunction("_maplib", false, "SetPlayerPosition","nnn", 3,8,3);
SetItem("chest1","_itemkeys");
SetActiveFlag("chest1",false);
ClearCollisionRect("chest1",0);
}
***not important***
In the _maplib for the screen's data it should look like this.
***same***
Floor1Layout[8] =	{	0,	0,	0,	3592,	6664,	0,	0,	0,	0,	0};
Floor1Layout[9] =	{	0,	0,	0,	0,	521,	0,	0,	0,	0,	0};
***same***
8 = 6x6 small rooms
512 = 2x5 north-pointing - for doors, T-junctions, + junctions, passage corners, dead ends, etc
1024 = 2x5 east-pointing - for doors, T-junctions, + junctions, passage corners, dead ends, etc
2048 = 2x5 south-pointing - for doors, T-junctions, + junctions, passage corners, dead ends, etc
8 + 512 + 1024 + 2048 = 3592
Back
Answer 9
The section for the data in _maplib should look like this.
//defines the layout of the ground floor, instructions in readme  (floor 3)
//		  Y		X	0	1	2	3	4	5	6	7	8	9
Floor1Layout[0] =	{	0,	0,	0,	0,	0,	0,	0,	0,	0,	0};
Floor1Layout[1] =	{	0,	0,	0,	0,	0,	0,	0,	0,	0,	0};
Floor1Layout[2] =	{	0,	0,	0,	0,	0,	0,	0,	0,	0,	0};
Floor1Layout[3] =	{	0,	0,	0,	0,	0,	0,	0,	0,	0,	0};
Floor1Layout[4] =	{	0,	0,	0,	0,	0,	0,	0,	0,	0,	0};
Floor1Layout[5] =	{	0,	0,	0,	0,	0,	0,	0,	0,	0,	0};
Floor1Layout[6] =	{	0,	0,	0,	0,	2056,	0,	0,	0,	0,	0};
Floor1Layout[7] =	{	0,	0,	0,	3080,	7176,	6144,	0,	0,	0,	0};
Floor1Layout[8] =	{	0,	0,	0,	3592,	6664,	2568,	0,	0,	0,	0};
Floor1Layout[9] =	{	0,	0,	0,	12,	521,	520,	0,	0,	0,	0};
I'm not giveing the whole script for the screen data, just the coordinates.
7,3 - 3,7,3
7,4 - 3,8,3
7,5 - 3,9,3
8,2 - 4,6,3
8,3 - 4,7,3
8,4 - 4,8,3
8,5 - 4,9,3
9,3 - 5,7,3
9,4 - 5,8,3
9,5 - 5,9,3
Back
Answer 10
switch(GetState("this"))
{
case standing:
Stand();
case walking:
Stand();
case hit:
Hit();
case dying:
Die();
}
Back
Answer 11
Just place these functions at the very end, or after main().
Hit()
{
}
Die()
{
}
Your choice if you want to make it look organized/nice by adding the // above it with details.
Back
Newbie Questions and answers
Q: I'm confused about something in your tutorial, can you help me?
A:Post about it on the GU Forums, tell me in the chat. Also you can post in the thread
KOHTutorial and as long as you got something important to ask about it then you may reply even if it gets old.
Q: How come you didn't talk about...?
A: Same answer, just post or tell me and I might add it if I think it will really help out newbies.
Q: Do I have to memorize all these commands/write it down?
A: If you have a .cfl file you can press alt f1 or alt f2 in the codegenie. Then you can double click on the command and it will add it to the script. Take the .cfl file I gave you in my tutorial, and place it in the editor/cfl folder and test it out.
Play
These Quest were written for Open Zelda 6.2.4, and haven't been updated to support new features


![]() and left click the fill. Place your cursor on the screen and hold down the right mouse button and drag across the screen. To get rid of a fill press the F on your keyboard. Now try your best to create this picture:
and left click the fill. Place your cursor on the screen and hold down the right mouse button and drag across the screen. To get rid of a fill press the F on your keyboard. Now try your best to create this picture:

 If the screen coordinates do not match up that means your door is not aligned right. Let's save our screen! Place your cursor on file then click Save screen. Now click Back to Map layout. If it says Save the current screen? then click yes. It will only say this if you never saved the screen!
You should now be back to the screen with the cells. We need to put our screen in a group. Place your cursor on the top left of the screen 0,0. Hold down the right mouse button and drag. Make sure the blue borderline only covers the screen 0,0. Make sure you don't place the cursor too much top left, if you do you won't see a blue borderline. If you messed up with the borderline you can left click on the screen, then click on Edit Group, and last click Delete Group. I don't recommend doing it that way, instead right click the group and click Delete Group.
Before we test our quest lets save it awhile. At this point you only saved the screen and not the entire quest. Go to file, then click on save. To test our quest go to file, Test Quest in Open Zelda. Now there might be some reasons why your quest didn't load.
1. First make sure you downloaded Open Zelda.
2. Since this is your first time testing your quest it don't know where your Open Zelda is at.(only if you did not use OZ installer!)


 Screen Coordinates These are the coordinates for a screen. A screen is 320 by 240 pixels.

 Scroll down or up until you see Rock Sprite Sheet. Try to create the rest of the screen in two steps:


 To make a npc talk you need to use SetString. I want you to make the script for this screen. Just a basic script and try to figure out where this line would go:


 in each of the screens because we don't need to link every door. To cover it use this fill
  . Name the entrance gentrance. Don't forget to link gentrance to todungeon.
In screen 8,4 put a green guard and a blue guard in the screen. Name the green guard g1 and name the blue guard b1. Name the shutter shut1 In this screen were going to have the green guard give a red rupee when
it dies and the blue guard will give whatever. Were also going to have the shutter open when both guards die! Here is the script for the screen:
#include <entity>
 Name the chest chest1 and put a _tentacle in the screen and name it tent1. In this screen were going to make the chest not active and clear its collision until the enemy is dead.Use this script for the screen:
#include <entity>
 In the screen you see two different holes. These holes do nothing! We could have invisble holes but that would get annoying. I just have the sprites there so its not invisible. In your fill section you'll see two fill tiles. One has a H1 and the other has a H2. These are the two different types of holes.I'm sure you can guess which one hurts the player and which one takes you to a new screen.
Ok drag the H1 fill over the hole towards the right side of the screen. Now drag the H2 over the hole towards the left side of the screen. If you would test out the game now the right hole would hurt the player and the left hole would take you to screen 0,0. It takes you there because it's the default coordinates.
To script for which screen you want the player to fall to use this script:
#include <entity>
 In screen 7,7 name the door stairdoor1 and in screen 7,5 name the door stairdoor1a. I hope you remember how to link doors because I'm not telling you how to link doors anymore! Go ahead and test it out now.
In screen 7,3 I'll show you what you can do with a spike enemy and doors
 Now use this script for the screen:
#include <entity>

 Now click on Sprite, create sprite. Right above each option has an explination of it's purpose so I'm not going to explain it in this tutorial. For the sprite code put kohspr1. Leave the mask code blank. Have the background box checked. Last click on Redefine and choose OK. This last step isn't really needed but it helps it align it perfectly if it's slightly off. Now save your work and head back back to your main quest. Click on any screen and see if the sprite shows up for you. Now were going to do the same thing for the rest of the ground sprites except for the middle. Name the rest of the sprites kohspr2, kohspr3, kohspr4, etc. To make things easier follow this diagram to help you figure out the names for all of the sprites.
 Remember, if the boxes aren't aligned right then click on redefine and then ok. Next we'll create a fill tile. In the diagram where the X is at is where we'll create out fill. Create the box around it and then click on Sprite, create sprite. Name the fill kohfill1 and have the boxes Background sprite and Display as fill tile checked. Now save it and see if it shows up. It should show up with the other fills on the right side.
The next thing I'll show you is how to create an animated sprite. This is a two step progress. First we'll need to name all three of the animations and then set up the animation and speed for the sprite.
Create borders around each flower. The size for each one should be 8x8. Give it the names KOHflower1, KOHflower2, and KOHflower3. Each sprite should have the background box checked. Now we're going to change the flower to an animation. Click on sprite, create animated sprite. You should now see all the names of your sprites on the right side. Click on KOHFlower1 and then click on add. Now do the same thing for KOHFlower2 and KOHFlower3. The animating speed for most objects will be a 5, and this is the case for the flower as well. So go ahead and click on the OK button and save your sheet. Feel free to test out your quest to see if they animate for you. It will not animate in the QD, you'll have to run your quest to see.
The last thing I'm going to teach you is how to add an entity to your quest and by useing a param. When createing a sprite for an entity the name you give it must match. This last entity were creating is a gold rupee and will be editing _itemrupee# file in order for it to show up. Before we name this rupee I want you to open up your _ItemSheet1 sheet and take a look at the rupees on the sheet. You should notice the sprites that have the box sprite represents an entity checked all start with the name _itemrupee. This is because of the entity file _itemrupee#. The # is for params. The params g,b,r,and p have already been taking by these rupees. _itemrupeeg has the param g. _itemrupeeb has the param b. Do you understand how params and naming works? Hopefully you do because were about to start work on your gold rupee.
Open up KOHtutsheet again and put a box around the first rupee. Give it the name _itemrupeey and check the sprite represents an entity. The width will be 8, and the height 16. Make sure background sprite is unchecked. Since this is representing an entity, making it a background sprite to will make the sheet think it's missing an entity file to go with it. We used the letter y because g was already taken. Y will stand for yellow in this case.
Name the other rupees _itemrupeeya and _itemrupeeyb but do not check any box since it's not needed.
You are now done with making the sprites for this sheet but before we save it let's give the sheet a name. Click on Options, spritesheet properties and give it the name KOHTutsheet. Now the name should show up when viewing the sprites in the editor. Now save your sheet. At this point your entity will not show up when testing your quest until we edit the entity for it. Open up _itemrupee#. In the FirstRun section right after if ( param == 'p' ) I want you to add this script.
if ( param == 'y' ) // yellow/gold
 Want a Tip?
 1. Name: e_kohboss and check the box for entity